Showing posts with label sewing. Show all posts

Tuesday, December 06, 2011

Onesie Dress

Still more baby shower gifts to share...

This was probably the quickest and easiest of the clothing items I made. Prudent Baby has a very easy to follow tutorial for a onesie dress, and I knew I wanted to make one.

I decided to combine the idea with the necklace onesies that have been all over Pinterest. I really didn't follow any of the tutorials, but there are plenty out there if you want one. I just sort of eyeballed it and went with what looked good.

This was such a quick, easy, and inexpensive way to personalize one of those plain white onesies. Hooray for craftiness!

Thursday, December 01, 2011

Embroidered Onesies

More baby shower goodies!

When I thought about practical, yet fun, gifts for the family and expected baby- clothes came to mind, of course. But, I wanted to be sure to make something that would be unique.

I took fabrics and colors from other projects and worked from there.

The onesie in the back left is an "S" in the owl fabric for the baby's first initial. Back right is a cupcake- in colors pulled from the owl fabric. And the front one, is my favorite.

I screen printed the skull and crossbones onto the fabric patch first. I used my Cricut to cut the shape out (from the Mini Monsters cartridge) of vinyl. Then I put the vinyl on the fabric and painted the fabric paint over that. I wasn't sure it would work- I was a little worried about the paint bleeding under the vinyl, but I shouldn't have. It worked like a charm!

Plus- I used the shape that it cut out as a tattoo for my sewing machine.


I'll definitely be trying the Cricut vinyl for screen printing single items again.

Wednesday, November 30, 2011

Bapron!

More baby shower gifts to share today.

I think I found this idea on Pinterest (are you on Pinterest? Man, that site is like a wormhole for me- but I've found some amazing ideas there.).

Since we've recently started feeding Noodle solids, I've noticed that bibs are a fun toy/challenge for her. She wants to eat the bib instead of her food. She has yet to yank a bib off, but they definitely don't keep the food off her clothes when they are in her mouth.

When I saw this, I thought it was genius. It's part apron, part bib- bapron! It has armholes and ties around the neck, so baby can't take it off.

The pattern and original idea are from a great blog called Craftiness is Not Optional. The pattern and tutorial are super easy to follow. Just pick out some fun fabrics that you love, and away you go!

I made this in two different patterns- the owls (from yesterday's post) and a blue and purple flower print I had in my fabric stash. I made the bias tape that is on the owl bapron, and used store bought (from my stash) for the flower bapron. It's funny how different the bapron can look, depending on the fabrics and colors you choose.

I have a few cut out at home for Noodle, but I haven't had time to stitch them up yet. I need to get on that!

*Feel free to find me on Pinterest, I've got a link over there on the right*

Tuesday, November 29, 2011

Loveys

Alright, I know I've been gone a while- again. But, I have been crafting while I've been away. It's just getting difficult to find time to craft, photograph, edit the photos, and blog.

The next few entries will show off some baby shower gifts that I made last month. Hooray!

Some good friends are expecting their first baby (a girl) in January. I spent a lot of time thinking about what I wanted to make for their new family member. Originally, I'd planned to make a blanket, with some matching loveys. Prior to starting the blanket, I learned from the mom-to-be that she had already received several lovely hand made blankets. So, I decided to rethink my gifts.

I made the loveys anyways, because I guessed that she had not received any yet. I know the mom-to-be will have to go back to work, and the little one will be in daycare a few days a week. Loveys are really helpful to have any time baby is sleeping away from home/in an unfamiliar place. Mom can sleep with them for a night or two before giving them to the baby, so they smell like her (and thus like home and comfort).

Of course, you can't have just one because if it needs to be washed baby might be upset to go without. So, I made two matching loveys- using this tutorial as a starting point.

I used a cotton print on the front and a minky fabric on the back. The minky is irresistibly soft, I wish I had my own grown-up size blanket like this.

I read a lot of things online about minky being ridiculously difficult to sew with, but that wasn't the case for me. Now, that could be due to my gorgeous new sewing machine (I got a Brother 294 stitch Project Runway machine for my birthday), or it could just be that I went slowly and was extra careful because of the warnings I'd read. Who knows.

I chose this cute owl pattern, because I remember the overwhelming influx of pink when Noodle was born. It was like a Peptol Bismol bomb went off in our house. Don't get me wrong, pink is fine- in moderation. But, I am always more than happy to get an item for Noodle that isn't pink.

These 10x10 loveys are super easy to stitch up and make a great gift. I'm planning to make some for Noodle soon.

Later this week, I'll show off some of the other gifts I made.

Wednesday, October 26, 2011

Taggie Toys

This past weekend we were invited to a Baptism for a good friend's daughter. I wasn't able to attend due to prior commitments, but my husband took Noodle.

I know what an important and special time this is for families and I wanted to make a gift from the heart that the child could enjoy.

I originally considered making a "quiet book" for the little one to enjoy during her many church services to come. However, I didn't have enough time to make one the way I wanted to- and it wouldn't be something she could use right away.

I decided to make some taggie toys for her instead. No squeakers, no crinkles, no noise at all. Just soft toys with tags of different shapes, textures, colors, and sizes for her to play with at church.

I tossed around a bunch of ideas as to what shapes to make- animals, regular shapes, fruits, etc. Ultimately, I decided to make the letters of her name (since it's both relatively short and appropriate to the occasion).

Each letter has two different fabrics (in blue shades)- so the front and back are coordinating fabrics, but not matching. The tags are just different ribbons I pulled out of my stash- some are ribbed, some are satin, and all different colors.

When I went to wrap up the gift, I decided to make a very quick bag to store the letters in. That way it was a cute way to package the gift and reusable storage for the toys. Win win.

My husband was confused by what the toys were, so he let Noodle (our daughter) demonstrate. Don't worry- we didn't let her chew on them! We left that honor to the young lady we were celebrating.


Monday, September 19, 2011

Felt Truck

I went to a birthday party for a friend's two year old son a few months ago (yes, yes- I know it took too long for me to get this post up), and even though we weren't supposed to bring gifts you know I couldn't resist something small and homemade.

My friend's son, G, is really into trucks. I don't know much about trucks, but thankfully I happened upon this great tutorial on Make it and Love it. I omitted several of the details because G doesn't have the book that was used for the model, and I really did want something relatively quick to make.

It was so easy, I can't believe I never thought to try something like this before. I've made some two dimensional things out of felt (and other fabrics) before, but now that I have a vague idea on how to make them three dimensional, I'm looking forward to trying it again.

This has been dubbed G's "snuggle truck" and apparently doubles as a comfy pillow. Hooray!

Friday, August 05, 2011

Sparkly Skirt

This is the last part in my dress-up gift series.

To complete the princess ensemble I made a very fun, very easy sparkly skirt.

Originally I was thinking I would make a separate waistband for the skirt- but my sewing machine was not having it. I love this sparkly material, but the waistband became more trouble than it was worth. I think once I have my serger up and running (and I know how to use it), I might try doing a skirt like this with a separate waistband.

At any rate, this skirt is basically a big old rectangle with a hem on the bottom and a gathered elastic top. So easy and quick. I took the birthday girl's waist measurements and doubled them (with a little room to grow). Then I cut the fabric to that length (width will depend on how long you want the skirt). I used my rolled hem foot on my sewing machine for the bottom hem (detail in the bottom right inset photo). I put comfy no-roll elastic in the top.

I swear this is a very easy project, and it turns out looking so much harder than it is. Impress your friends!

Tonight I'm going to break out my crochet hooks for the first time in a decade (at least)- if I'm successful, I'll have a new project to share next week. If not, I'll share another birthday project from last week.

Wednesday, August 03, 2011

Cape for a Princess

This is the second part of the dress up gift I made for a little girl who turned two recently.

The birthday girl's favorite colors are aqua (turquoise) and purple. I fell in love with this purple and silver striped fabric when I was shopping for materials. It's very lightweight, so even on the hottest of summer days (and boy we've had some hot ones here this summer) it's still wearable.

I got the pattern for this over at Prudent Baby (one of my new favorite sites for kid projects). They used faux fur for the collar, but I opted to use a sweatshirt material (because I had it in my fabric stash and I feel like it's easier to clean than faux fur).

I used a simple lilac ribbon for the tie on the cape. In the inset photo you can see how the drape a little better (sorry, all I had to model was my iron).

It was really easy to sew up and it turned out fantastic. I know that when I was two, I would have loved running around the yard with this waving in the breeze.

Tuesday, August 02, 2011

Princess Hat

This is a project from a few weeks ago. I would've posted it sooner but my little lady (who is not so little anymore at 15lbs) has been sick.

A few weeks ago we went to a birthday party for my friend's two year old daughter. I wanted to make her something unique and special. Out of the hodge podge of ideas I had, I decided to go with a Princess dress up set.

This Princess hat was pretty easy. All I needed was some felt, tulle, and sturdy interfacing. I've sewn with interfacing before, but in the past I've used light to medium weight interfacing. This stuff? Was crazy sturdy.

I cut out a triangle shape from the aqua felt- in retrospect I should have made the bottom curved, but I didn't think about that until too late. The bottom part was the length of the birthday girl's head circumference (so, if the head you are sewing for is 18 inches around, you want an 18 inch bottom), plus an inch for her to grow into it. I cut the same shape out of the interfacing and ironed it onto the felt.

Once that was done, I cut the "R" out of purple felt and appliqued it onto the aqua felt. I used an iron on fusible web fabric to attach the "R" to the aqua felt before I sewed it. I wanted to make sure it didn't slide out of place. I just used a simple zig zag stitch to attach it.

Before sewing up the side seam of the hat, I took my tulle (4 strips- 2 each of aqua and purple) and attached them to the top of the hat- with the short ends facing in towards where the seam would be.

Then, I sewed the two sides of the triangle together and once I was finished, I turned it inside out. Viola! Quick and easy project.

Later this week I'll show you the other pieces of the dress up set.

Thursday, July 21, 2011

Wet Bags

Yeap, I'm totally posting two days in a row.

Yesterday I mentioned sending some gifts to my friends who recently had twins and I shared with you the humorous gift I made.

Today, I'm sharing one of the more practical gifts. Homemade wet bags!

Before I had my little zucchini muffin (she gets all kinds of bizarre vegetable nicknames because it's more fun than calling her "the baby," though we do that too), I never really considered the fact that I might need to bring an extra outfit for her in case she needed to change while we were out and about. Now? Sometimes I bring two extra outfits- because you never know.

The first time I had to change her clothes, I had no idea what to do with the dirty clothes. I didn't want to put them directly into my diaper bag because they might get everything else in there dirty. So, I scrounged up an old grocery bag to use. Which made me think, "Hmm...wouldn't it be nice to have a reusable and washable bag to put this stuff in?"

The answer, is yes, it is nice. I made these bags without a pattern, just kind of winged it. I based the shape on the brown paper lunch bags I used to carry to school- but a little larger. The bags are lined with washable rip-stop nylon and have velcro closures. You can see the lining in the inset photo above.

These are my new favorite baby gift. They're super quick and easy to make and the materials aren't at all expensive. They use about a half yard of fabric each (with some to spare- just in case of mistakes) and a little bit of velcro.

Monday, July 18, 2011

Wonder Woman Inspired Baby Attire

So, I had a baby almost four months ago. My last post was written five days before my little lady decided to make her dramatic entrance into the world.

Since then, I've been busy, but I have found some time for crafts and baking. To make up for being so absent since last summer (holy crap, for a full year- that's really bad, I'm sorry!), I'm going to post every day this week. Woo!

First up is the newest outfit I made for my tiny one.

I love Wonder Woman. I've loved her since I was small- I had a photo of Lynda Carter as WW in my room and I even made my own WW costume for Halloween in high school. So, when my daughter was born (we didn't find out our baby's gender in advance) I knew she needed at least one WW outfit.

A few years ago DC Comics put out a Justice League series called The New Frontier. The artwork in the series is absolutely gorgeous. So, that's the image I chose for the onesie. I used a simple iron-on, printed the image in reverse (so the text would display properly), and resized it to fit on the onesie. I looked for fabric that would match WW, but I couldn't find any blue fabric with plain white stars. Ultimately, I'm pretty happy with the fabric I did find.

Next time, I think I'll invest in some printable fabric instead of iron-on material. The onesie looks just fine, but the image is already starting to break up because of how stretchy onesies have to be by nature. I was originally planning to sew the skirt directly onto the onesie. However, I decided to make it a separate piece so that we could pair it with other outfits.

Tomorrow? I'll be sharing some cross stitching.

Monday, March 21, 2011

Space Ghost Baby Sleeper

As a long time reader of This Mama Makes Stuff, I knew that I wanted to try my hand at her T-shirt to Newborn Gown tutorial.

This used to be my husband's Space Ghost t-shirt. He wore it so often that it was starting to get holes in it, and yet he refused to part with it.

When I suggested that maybe I could bring some new life to the shirt by making it into something for the baby, he was more than happy to donate the shirt.

The tutorial is fairly straight forward, but it does require some techniques that might be a little scary to new sewers.

Once you actually start putting the gown together, it's actually a pretty easy pattern- but if you're twitchy about inserting elastic or zig zag stitching a collar that's probably going to get wavy (meaning, it won't lie flat as you sew), this might not be a tutorial for you.

Now that I've used the pattern once, I'm hoping to put one or two sleepers together before the baby arrives- we definitely have some more shirts we love that won't work for us, but have plenty of material for a baby sleeper.

In case you're wondering: this was a men's sized L shirt previously, and I had way more than enough fabric to work with for the pattern.

(Apologies for the not so great picture quality, all I had on hand was my iPhone- the camera's in the hospital bag already.)

Super Mario Brothers Nursery

I know, I know it's been ages since I've posted anything. I've been doing things it's just that none of those things have been very original in the crafts or baking department. I apologize.

But, I'm back! With two projects that I had so much fun doing, I had to share.

Months ago, when my husband and I started talking about what we wanted to do with the nursery my goal was to choose something that wasn't sold as a set in Babies 'R Us. There's nothing wrong with that, but there also aren't a lot of gender neutral options (and we don't know our baby's gender).

I offered up two choices to my husband "Under the Sea" or "Super Mario Brothers." Being the gamer and technology lover that he is, he chose Super Mario Brothers and then asked my why I'd even bothered to come
up with a second idea.

Originally, I thought we were going to have to hand paint most of the decor in the room. We had a lot of time before the baby's arrival so I figured it would be no problem. When I told my sister about our idea, she found something even easier. Re-positionable wall stickers from Blik (found over at Think Geek). We ultimately decided to go with the New Super Mario Brothers stickers (because I wanted to include some of the newer characters that weren't around in the Classic game).

A lot of people have looked at me like I'm crazy when I tell them how we've decorated the nursery. I've also often been told that this is a "boy" room and now we're sure to have a girl. I politely mention that I happen to be a girl and I love playing Super Mario Brothers. Besides, take a look at a few other pictures and tell me this room isn't awesome.

The flying Goomba and Koopa protecting coins were a perfect fit for our Cape Cod ceiling.


Mario grabbing a coin before getting the extra life.


A "?" block and some bricks over the crib (my husband says these are here to protect the baby from anything Lakitu might drop). That awesome blanket came from Target.

Now, you might be wondering where the DIY portion of this room is. Don't loose your overalls- because there are definitely a few things in this room that were custom made.

What do you do, you might be wondering, when you create a very unique nursery theme and you can't find matching curtains? Well, you could just go with a plain coordinating color for your curtains. Or...you could make your own!

I searched for a very long time for Super Mario fabric. I failed, hopelessly. So, originally I was thinking I would make blue curtains and maybe putting appliquéd invincibility stars or piranha plants onto them.

But then, a good friend of mine mentioned that she'd seen Super Mario sheets for sale at Target. Sure, they're actually Mario Kart sheets, but good enough for me!

Curtains are probably one of the easiest sewing projects, in my opinion. You are basically just taking the fabric and finishing it in rectangles, with a loop at the top for the curtain rod.

In this instance, I used three different fabrics to make the curtains- a yellow for the curtain rod loop, the flat sheet for the smaller characters, and the pillow case (cut in half) for the larger characters. I also backed the curtains with blackout material- since the sheets were more sheer than your typical curtain fabric. (If you look in the lower right corner of the photo, you can see the lamp from Ikea that was my inspiration for the room- it reminded me of the tree tops in Super Mario Brothers).

Unfortunately, neither the wall stickers nor the sheets had any female characters included. Well, that simply will not do. So, I used a tutorial from How About Orange to create some additional artwork.


I knew I wanted to include Princess Peach, Birdo, and Yoshi. My husband requested Toadette and Bowser.

I love the way these came out- we have more bad guys, some rocking female characters, and original artwork. Hooray!

I'm still hoping to get a laundry bag made from the fitted sheet (from the Mario Kart sheet set) before the baby arrives. If/when that happens, I will post about that as well.

Wednesday, April 28, 2010

Rocketship Pillow

*Housekeeping note: I have a slight backlog on projects I want to post. I'm going to try to catch up, but my camera is not working so I may be MIA until I can take care of that issue- or I might post and add photos at a later date*

Last month when our family visited we celebrated my nephew's fourth birthday. You remember the giant cupcake cake, right? Right.

Since our nephew was visiting on his birthday and he was on a roadtrip with untold number of hours spent in the car, I wanted to make him something fun that would come in handy on the trip.

I looked through my One Yard Wonder book and found a super cute Rocketship Pillow that I thought would be perfect. Comfy and useful for napping in the car, cute and fun for at home, and it even has a little pocket where he can stash his stuff.

If I could go back in time and remake this, I think I would put piping on the "fins" of the rocketship (there are three, the third is in back). I used piping on the pocket instead of bias tape, because I liked the look more. I modified the pattern by sewing on "windows" that had "aliens" peeking out of them.

This is not a pattern for a beginner. But if you can piece your way through it, you do end up with a very cute and useable pillow.

Sunday, July 12, 2009

Sewing Challenges

I am currently working on a new project that involves minimal sewing. I'm really excited about it, but also feeling anxious.

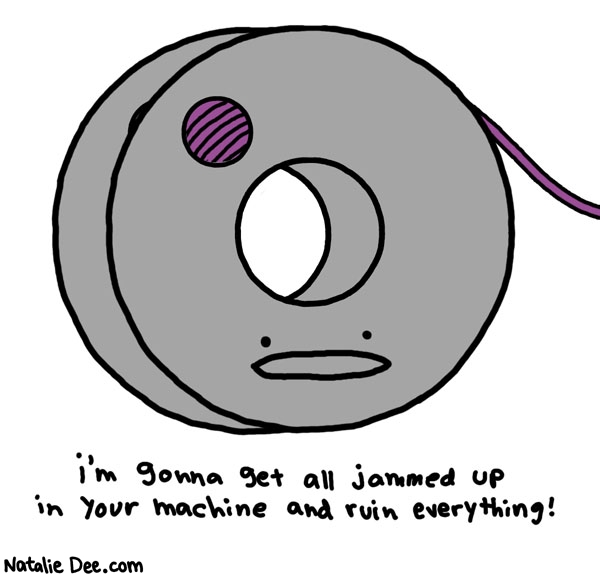
Why the anxiousness, you ask. Well, this Natalie Dee cartoon pretty much sums it up.

nataliedee.com

Yeah, I'm having bobbin issues. Or maybe it's tension issues. Or something. I blame the bobbin because the thread keeps getting stuck down there.

I haven't actually sewed anything on the project for fear of destruction. So, here's keeping my fingers crossed and hoping I can do it without any hassle.

But for now, enjoy the above cartoon. I know I'll be looking at it the next time my bobbin gets messed up so that I won't feel alone in my bobbin disasters.

Friday, April 03, 2009

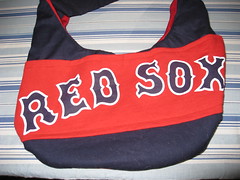
Red Sox Purse


Red Sox Purse
Originally uploaded by Cup O'Cake Designs
I thought today I would post one of the sewing projects I worked on for a client this past holiday season.

I know that lately the blog has become pretty focused on cupcakes (and baking in general), but I am still doing some other craft projects and this was a great one.

I was contacted and asked to help create a special holiday gift for a client's grandmother. As you may have guessed from the photograph, grandma loves the Red Sox*. However, poor grandma's t-shirt was no longer wearable as the player (Coco Crisp) was traded.

I used the t-shirt along with coordinating colored fabric to create a one of a kind hobo bag for grandma. The back of the bag featured the numbers from the t-shirt, cut in such a way that you cannot tell they belong to an ex-Red Sox player.

The bag has an inside pocket (handy for a cell phone or other small items) and a snap closure (as requested by the client).

I think that sewing projects like this are my favorites. I know I have at least five t-shirts laying around that I don't want to toss or give away, but that I don't (or can't) really wear any more. What better way to keep them in your rotation then by up-cycling them into a cute bag.

Have a shirt you'd like up-cycled? Email me!

*Full disclosure: I am a Cleveland Indians fan, so please spare me the Yankees/Red Sox debate.

Tuesday, July 01, 2008

Ring Pillow

(click image to enlarge)

A very dear friend of mine got married in April. Having gotten married fairly recently myself (2 years ago last month), I offered to do whatever I could to help with the wedding. She asked me to make some tags for favors and to sew her ring pillow. She has a great eye for design and had something very specific in mind. I'd never made a pillow cover before (I have sewn home made pillows, stuffed with fiberfill), but I was definitely up for the challenge.

I had her pick out the fabric- to ensure that it would match the wedding colors, and be something she would want to keep at home, after the wedding (as an accent pillow). She also designed the pattern for the pillow itself.

I had never sewn curves into fabric before. I practiced on some fabric scraps that I had, to get the hang of it. I watched numerous YouTube videos demonstrating the technique. I had more than enough fabric to try again, if I messed up. Of course, being a perfectionist and this being for a friend's wedding, I didn't want to mess up.

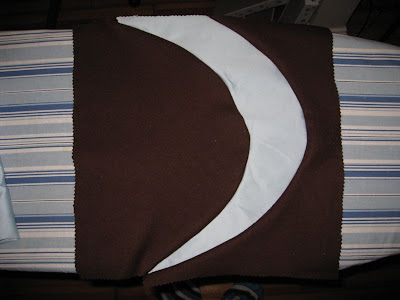
Luckily, it turned out pretty well. The blue curve wasn't as even or centered as I would have preferred, but I think I am probably the only person who would have noticed that. You can see from the picture below that sewing the back to the front off set the image a little. The colors in the below picture are also more true to life.

Wednesday, February 20, 2008

Purse


(click image to enlarge)

While we're on the theme of sewing and homemade gifts, I made this purse for my Sister-in-Law's birthday. I have made bags for myself in the past, but never anything from a pattern and never anything really structured, per say.

This is a Simplicity Sewing for Dummies Pattern (4178), but let me tell you- the instructions are confusing as all get out. I did just fine sewing the outer fabric to the interfacing, and even sewing the lining on to those pieces. Once it got to the section where you started sewing the two halves of the bag together all hell broke loose.

It probably didn't help matters that I decided to ammend the pattern (this seems to be where most of my sewing issues start). The pattern called for a large snap closure (optional) and I thought that a zipper was more appropriate given the size of the bag (this thing is HUGE). Although I'd never sewn a zipper onto anything before I didn't think it would be that confusing or difficult.

I know what you're thinking, it's the zipper that threw me off. And actually, it really isn't. I got the zipper on just fine (even added an inside pocket with no issues- once again, not in the original pattern). The directions on how to add the strap to the purse might as well have been written in sanskrit. Even after assembling the purse (making up the strap directions myself), I still haven't a clue what they were saying.

Overall, I'm pleased with how this came out. I made myself a smaller version (the pattern has three sizes), and I think improved on it even more. Plus, I learned to sew darts using this pattern. That's a useful skill.

(Thank you to my Husband for hand modeling)

PJ Pants

(click image to enlarge)

Another year, another round of PJ pants. I made pants last year for the family (my Husband and my immediate family) as a way to incorporate some of my Husband's traditions into my family's Christmas.

I was a little hesitant to make them again this year because they are so time consuming. However, after polling the family everyone wanted another pair, so off I went to the fabric store. I took requests this year (left to right: Pa, my sister, Mom, myself, and my Husband).

I couldn't find the pattern I used last year, so I had to purchase a different one. That...turned into a miniature disaster. Last year's pattern was so insanely easy (two pieces per pair of pants) and this year's was slightly less so. This year's pattern called for a yoke around the waist line. I? was not into that.

Instead, I chose to cut the top longer (to allow extra room to fold over the waist band myself). I also left out the pockets from this pattern because who even uses pockets in their pj pants? The pocket reduction caused no problems. The yoke reduction? Yeah, major problems.

I just didn't allow enough room in the top of the pants. My pair specifically ended up being below the waist line (which is sometimes ok for jeans- sometimes- but not ever for pjs) and a major disappointment. I did get the elastic right this year (last year the waistband was too loose), so at least there's that.

Of course, after Christmas, I found the pattern from last year. I will be using that one next year.

Aprons


(click image to enlarge)
I love giving homemade gifts. I can't always do that because sometimes I just can't come up with something appropriate. This year for my Mother's birthday, I decided to make her some aprons. She has been taking cooking classes and really getting into it for a few years now. She has an apron (maybe two) at home- but just the boring white ones. I had read an article about hostess aprons and thought that they would be a great gift for Mom since she often hosts dinners at her house.

I looked through a lot of patterns before settling on the two above. There was just something about the deliciously retro feel that drew me in. Originally, I set out to make four aprons (two full, two half)- three from the pattern on the left, and one from the pattern on the right.

As her birthday approached, life kind of got int he way. Ultimately, I ended up only completing two aprons. I still have all of the fabric and the patterns, so I hope to finish the other two at a later date for her.

I made the full apron pictured in the center of the Butterick pattern. That was quite a challenge. I had never sewn a ruffle before. I think it turned out ok in the end, but I definitely learned a lot about how to sew two curved pieces together. I would highly suggest practicing that first on some "extra" fabric you have laying around. It's not as easy as you might think.

I made the half apron pictured in the bottom right corner of the Butterick pattern. That one went much smoother.

Both aprons turned out very cute, but I definitely had to make up parts of the pattern on my own. I dont' know if anyone else has this problem, but I consistently am unable to understand sections of pattern instructions. I think whoever writes those directions thinks you are a mind reader. They go from pinning piece A to piece B directly to sewing the cross section of F to the rouched edges of piece A. What? When was I supposed to rouche A?

Anyhow. Sewing is definitely a labor of love. I always love the things I make, but while I'm in the process I feel like kicking and screaming.

(I used the chicken fabric on the right for the full apron
and the fabric right next to that for the half apron)