Showing posts with label Birthday. Show all posts

Monday, September 19, 2011

Felt Truck

I went to a birthday party for a friend's two year old son a few months ago (yes, yes- I know it took too long for me to get this post up), and even though we weren't supposed to bring gifts you know I couldn't resist something small and homemade.

My friend's son, G, is really into trucks. I don't know much about trucks, but thankfully I happened upon this great tutorial on Make it and Love it. I omitted several of the details because G doesn't have the book that was used for the model, and I really did want something relatively quick to make.

It was so easy, I can't believe I never thought to try something like this before. I've made some two dimensional things out of felt (and other fabrics) before, but now that I have a vague idea on how to make them three dimensional, I'm looking forward to trying it again.

This has been dubbed G's "snuggle truck" and apparently doubles as a comfy pillow. Hooray!

Friday, August 05, 2011

Sparkly Skirt

This is the last part in my dress-up gift series.

To complete the princess ensemble I made a very fun, very easy sparkly skirt.

Originally I was thinking I would make a separate waistband for the skirt- but my sewing machine was not having it. I love this sparkly material, but the waistband became more trouble than it was worth. I think once I have my serger up and running (and I know how to use it), I might try doing a skirt like this with a separate waistband.

At any rate, this skirt is basically a big old rectangle with a hem on the bottom and a gathered elastic top. So easy and quick. I took the birthday girl's waist measurements and doubled them (with a little room to grow). Then I cut the fabric to that length (width will depend on how long you want the skirt). I used my rolled hem foot on my sewing machine for the bottom hem (detail in the bottom right inset photo). I put comfy no-roll elastic in the top.

I swear this is a very easy project, and it turns out looking so much harder than it is. Impress your friends!

Tonight I'm going to break out my crochet hooks for the first time in a decade (at least)- if I'm successful, I'll have a new project to share next week. If not, I'll share another birthday project from last week.

Wednesday, August 03, 2011

Cape for a Princess

This is the second part of the dress up gift I made for a little girl who turned two recently.

The birthday girl's favorite colors are aqua (turquoise) and purple. I fell in love with this purple and silver striped fabric when I was shopping for materials. It's very lightweight, so even on the hottest of summer days (and boy we've had some hot ones here this summer) it's still wearable.

I got the pattern for this over at Prudent Baby (one of my new favorite sites for kid projects). They used faux fur for the collar, but I opted to use a sweatshirt material (because I had it in my fabric stash and I feel like it's easier to clean than faux fur).

I used a simple lilac ribbon for the tie on the cape. In the inset photo you can see how the drape a little better (sorry, all I had to model was my iron).

It was really easy to sew up and it turned out fantastic. I know that when I was two, I would have loved running around the yard with this waving in the breeze.

Wednesday, April 28, 2010

Rocketship Pillow

*Housekeeping note: I have a slight backlog on projects I want to post. I'm going to try to catch up, but my camera is not working so I may be MIA until I can take care of that issue- or I might post and add photos at a later date*

Last month when our family visited we celebrated my nephew's fourth birthday. You remember the giant cupcake cake, right? Right.

Since our nephew was visiting on his birthday and he was on a roadtrip with untold number of hours spent in the car, I wanted to make him something fun that would come in handy on the trip.

I looked through my One Yard Wonder book and found a super cute Rocketship Pillow that I thought would be perfect. Comfy and useful for napping in the car, cute and fun for at home, and it even has a little pocket where he can stash his stuff.

If I could go back in time and remake this, I think I would put piping on the "fins" of the rocketship (there are three, the third is in back). I used piping on the pocket instead of bias tape, because I liked the look more. I modified the pattern by sewing on "windows" that had "aliens" peeking out of them.

This is not a pattern for a beginner. But if you can piece your way through it, you do end up with a very cute and useable pillow.

Monday, April 26, 2010

Reece's Cup Cake

No, not cupcakes- a Reece's Cup cake.

Sunday was my husband's birthday and I asked him what kind of cake he wanted. He said "surprise me." That is...kind of dangerous because it allows me to do whatever I want, meaning not necessarily what he would want.

However, it being his birthday I went with one of his favorite things: peanut butter. And who doesn't immediately think of chocolate when peanut butter desserts are on the table?

I started with a yellow cake recipe from my Sur La Table baking book (another recipe towards my resolution!). I read their whole primer on cakes, even though I've been baking cakes (and cupcakes) for quite some time now. I didn't learn a whole lot of new information, except that pre-beating your eggs (just enough to mix the whites and yolks) can help keep your cake light and fluffy. The other stuff was mostly information about bringing cold ingredients up to room temperature before adding and the importance of sifting.

The yellow cake recipe yeilded much less cake than I had anticipated, so I used one 9 inch round pan, instead of two. Since I only had one 9 inch round of cake, I decided to section it into three pieces, instead of two.

I found a quick and easy peanut butter frosting recipe in my Martha Stewart Cupcakes book. I was a little surprised to see that it called for cream cheese, but it was delicious. The peanut butter frosting was put between the layers of cake and I should have been a little more generous with the frosting.

To top the cake I used a chocolate ganache recipe (from Sur La Table, again). I was beyond pleased that my crumb coating worked like a charm. (Crumb coating, in case you don't know, means that you coat the cake with a thin layer of frosting/ganache and then let it set. Once the layer is set, you add a more generous layer of frosting/ganache so that the crumbs do not show.)

As a final touch, I added some mini Reece's cups and peanut butter frosting accents. This cake should be kept chilled until about fifteen or twenty minutes before serving.

Mmm, don't you want a piece?

Thursday, April 08, 2010

Giant Cupcake Cake

I know I've been MIA for a bit- things were a little hectic. We had a visit from some family and then our basement flooded. No worries, everything/everyone is just fine and dry now.

Our family's visit coincided with our nephew's 4th birthday. Although we celebrated his birthday in NYC a few days before his stop by our place, I was itching to try out my Cupcake Cake pan and this occasion was too good to pass up.

My nephew requested chocolate cake, so I used my favorite recipe and layered vanilla buttercream in between the "frosting" and the "cake" sections.

My crumb coating is terrible on cakes. Terrible. I wanted this cake to look like a cupcake I would bake and not like one I'd dropped on the floor. I decided to try using rolled buttercream (because I'm pretty sure my nephew would not have enjoyed eating fondant on his birthday).

My experience with rolled buttercream was interesting. I am a perfectionist (I may have mentioned that before) and I got quite frustrated. The rolled buttercream was probably a little too warm (too much kneading by hand) and a little too sticky (I kept adding powdered sugar by the handful, but it never seemed to un-stick).

However, having said that- I think it looked great on the finished product. Plus, it tasted really good too. It's quite sweet, but I think that's right in line with it being a buttercream product.

I used the leftover cake batter to make coordinating cupcakes.

Monday, April 27, 2009

S'more Birthday Cupcakes, Please


Fired Up
Originally uploaded by Cup O'Cake Designs
My husband's birthday was this weekend. I'd been bugging him for quite some time about what he thought he might like to have. He suggested possibly the Peanut Butter Chocolate cupcakes I made for the wedding tasting, but I wanted to try something different.

I was going through my copy of Vegan Cupcakes Take Over the World and calling out ideas to him when I came upon their recipe for S'mores cupcakes. Perfect! He's been a vegetarian for almost a year and hasn't eaten any marshmallows in that time (since they contain gelatin which is an animal product).

Taking a closer look at the recipe I discovered that they called for their Vegan Vanilla Buttercream. I love that frosting (in fact, it's my new go-to for Vanilla Buttercream), but my Husband does not. Not to mention the fact that I wanted something that was at least vaguely marshmallow-y. Otherwise? How is this like a s'more at all?

I had originally planned to make Vegan marshmallows, but got completely overwhelmed by a number of other things in life (though I do plan to make them at a later date). So I had to search for something else. Marshmallow fluff!

Believe it or not Marshmallow fluff does not have any animal products in it. I used the same recipe for 7 minute marshmallow fluff frosting that I used a while back for the Orange Creamsicle cupcakes. Now, please take note: this is not vegan frosting, it contains two egg whites. My husband does eat eggs, so it wasn't an issue for us.

The cupcakes turned out great. They weren't exactly what popped in my mind when I thought about them, because I'd expected a chocolate cake. These were a molasses cake, which made them extremely moist.

The frosting was super messy. But, what good s'more isn't?

We had a cast party for the play my husband is currently in on the evening of his birthday. The woman who is playing his wife in the show had her birthday the following day. What better way for the two of them to celebrate with their own special cupcakes.

You can see pictures of the whole group of cupcakes on my flickr.

Friday, March 27, 2009

Birthday Cow


Birthday Cow
Originally uploaded by Cup O'Cake Designs
Waay back in November (I told you I'd try to catch you up on all I did while I took a haitus from blogging), a good friend of mine hired me to make her 24 cards (a mixture of Birthday, Thank You, and blank cards). I was beyond excited, and also a little overwhelmed.

When I make cards, I tend to either make them one at a time, or end up with a series of cards that all look similiar. I was a little nervous about being able to offer my client (I love that word, by the way!) a broad range of cards that she would be able to use. I wanted to make sure that there was a card in there for everyone on her list.

This card was one of the Birthday cards that I created. I have loved this cow stamp (part of an older Stampin' Up set) as long as I have had it, but I definitely have not used it enough in the past 8 years.

Even though the card includes flowers on the patterned paper (though, they could be sunbursts) and a ribbon, I still believe it is neutral enough to serve as a birthday card for men.

You can see some of the other 23 cards at my flickr.

Tuesday, September 23, 2008

Make a Wish (Birthday)

I made this card last week for a friend who had a birthday. It was inspired by a card over at the Pink Stamper.

I used my Cricut to cut out the cupcake as well as the squares. The squares are put on the card using pop dots for dimension. I used a gel pen for the sprinkles on the cupcake.

Two different colored papers are used for the background, with a ribbon pulling them together.

The sentiment in the upper left corner is stamped.

Wednesday, September 03, 2008

Enjoy (Birthday)

(click image to enlarge)

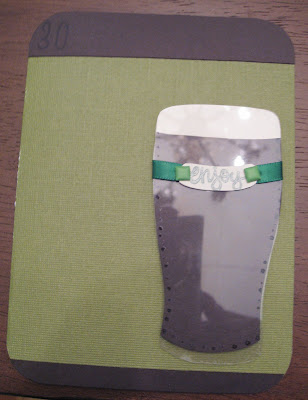
I made this card for a friend's 30th birthday. I wanted something that went with the theme (well, my theme) for the night- my husband & I gave the birthday boy Guinness and home brewed beer as a gift and I'd made a delicious Guinness cake for the party. Thus, the beer on the card.

The Guinness itself was paper pieced. I cut out the beer and the foam first, and then used an Overhead (clear plastic sheets) to cut out the pint glass- and yes, I cut out two pieces (one for the back and one for the front) to make it more authentic.

After I put the pint together, I stamped the sentiment and went over it with a gel pen. I cut out the piece of paper to make it look like it was curved along the glass. Then I attached a ribbon to the sentiment using brads, and put the ribbon around the pint. The pint is raised off the paper using pop dots.

Finally, I stamped "30" in the upper left corner with Versamark and rounded my edges with a paper punch.

Tuesday, July 08, 2008

Happy Birthday (7)

(click image to enlarge)

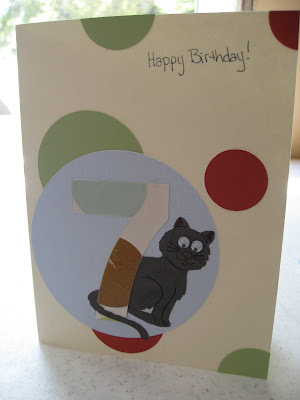
I made this card for my cousin who just turned 7. I wanted to highlight her age and use a theme that fit with the wrapping paper her gift was wrapped in.

All of the shapes were cut out with the Cricut. I used the wrapping paper to cut out the 7, and coordinating colors for the other dots on the card. I traced the cat's accents with gel pens and used google eyes to make the card a little more playful.

Monday, April 28, 2008

Happy Birthday (Piece of Cake)

(click image to enlarge)

I made this card for my Husband for his birthday last week. It's super simple because I spent most of my time paper piecing an iPhone (more on that later).

I love this color scheme, even though the photo doesn't do it justice. I used a nice bright turquoise with black accents.

All of the images are stamped. I went over the stamped gifts in a sparkle gel pen, because the ink wasn't standing out enough on the black stripe. The stamp on the black stripe was repeated three times.

Wednesday, September 19, 2007

Happy Birthday

(click image to enlarge)

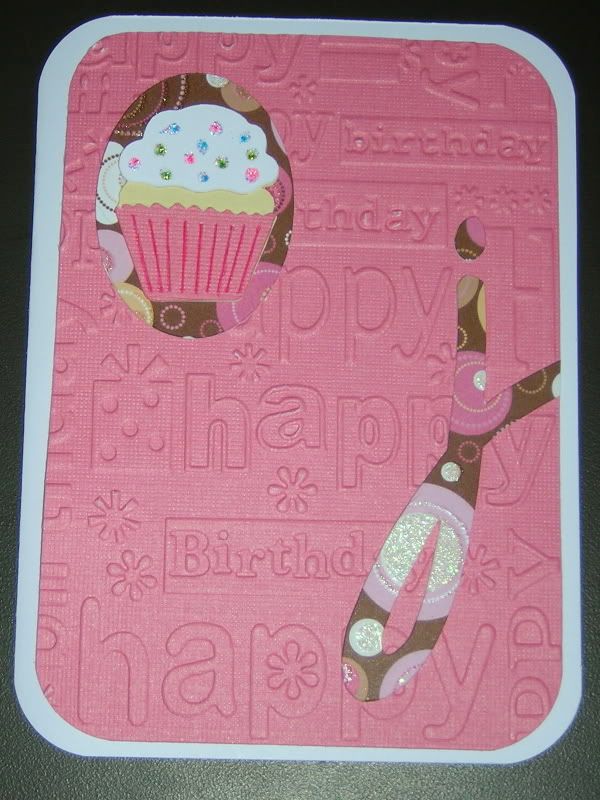
I made this card for a friend from College. I wanted to do something simple- that said Birthday without being too over the top.

I embossed the pink background paper using my Cuttlebug. I cut the "j," oval, and cupcake out using my Cricut. I colored the "sprinkles" on the cupcake using a gel pen and then went over them with iridescent glitter glue. I finished off the card by using a rounded corner punch on the background paper and the card itself.

The inside is blank.

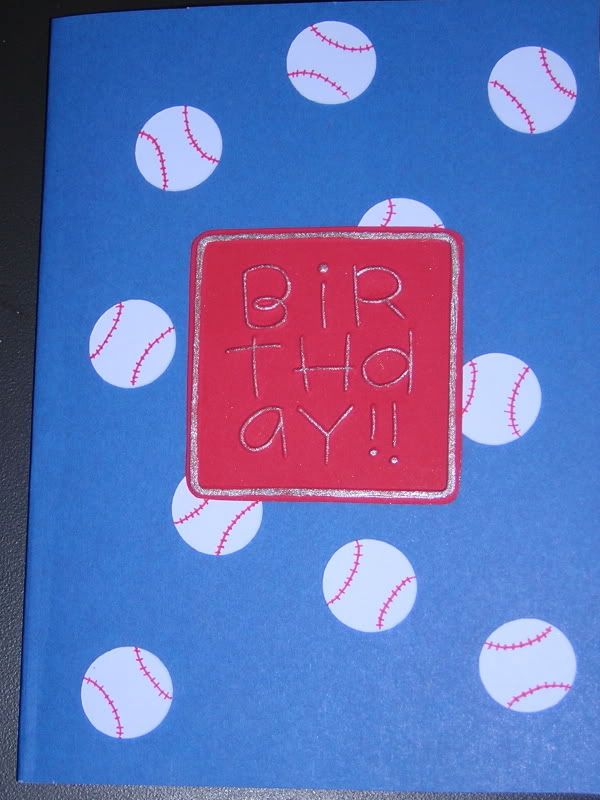
Birthday!!

(click image to enlarge)

I made this card for my nephew's birthday. He is having a baseball themed party, so I thought it would be nice if the card matched.

I cut ten 1-inch circles out using my Cricut. Then I used a gel pen to draw on the baseball stitching. I used my Cuttlebug to emboss the "Birthday!!" sentiment. I went over the raised lettering with a silver gel pen to help it stand out more.

The inside sentiment reads "Hope your Birthday is a real ball!"

Friday, April 13, 2007

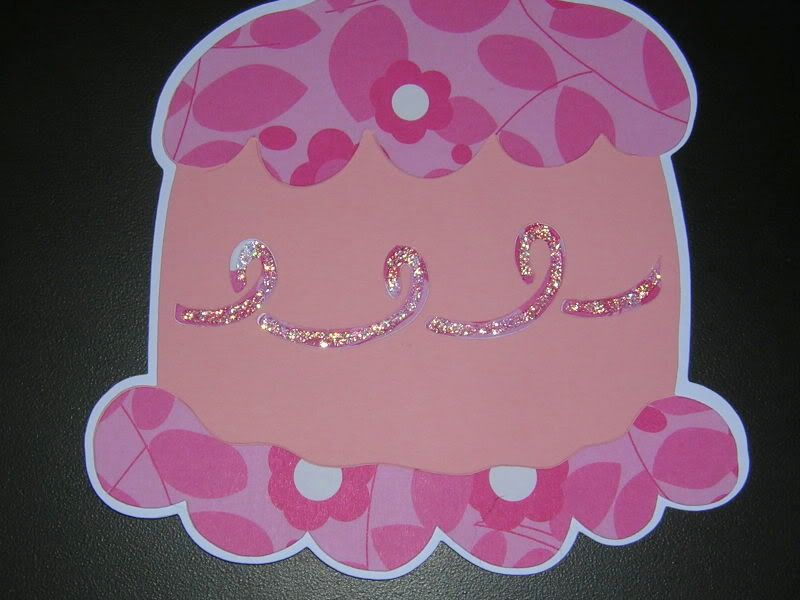
Celebrate! (Birthday Cake)

(click image to enlarge)


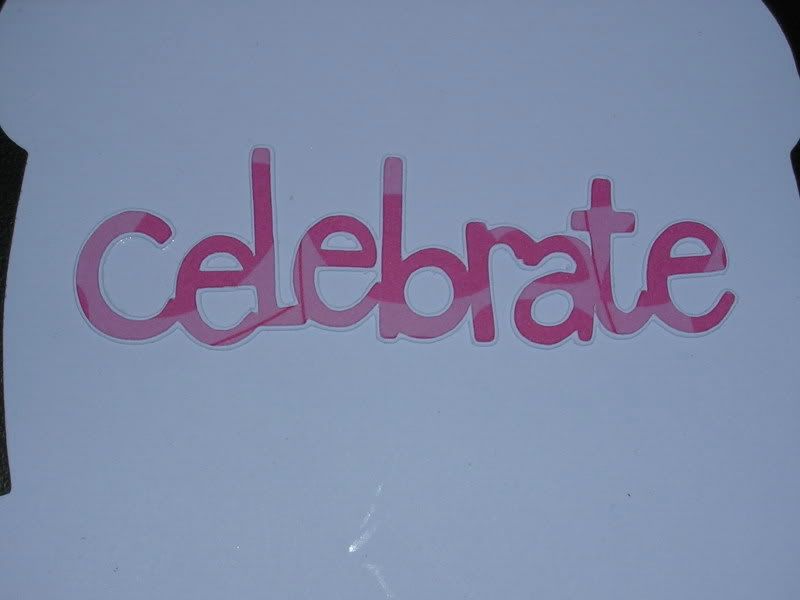
This is a really simple card that I made for my Aunt's birthday. I cut the cake using my Cricut. I cut the cake twice, and then cut out the icing in the patterned paper. I used glitter glue to give it a little sparkle.


The back of the cake says "Celebrate" in the patterned paper, again cut with my Cricut.


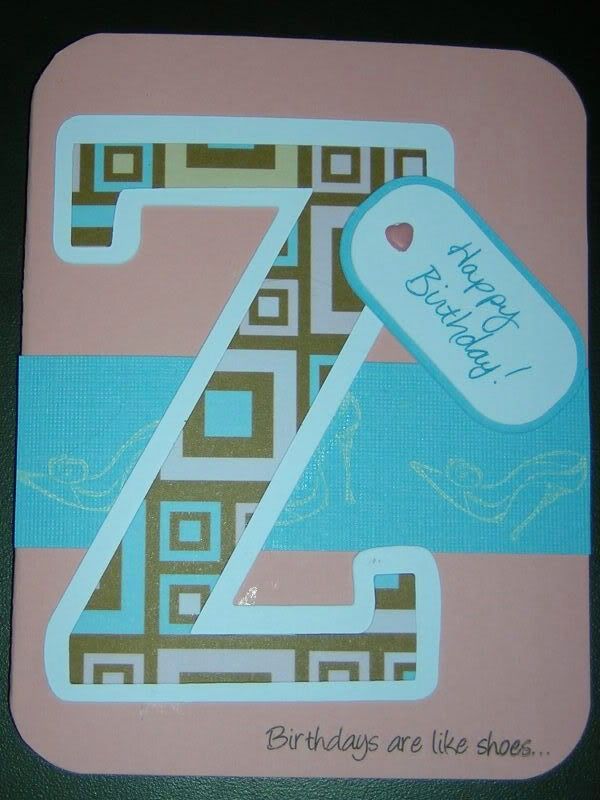
Birthdays are like shoes...

(click image to enlarge)

This was a pretty simple card to make. I used my Cricut for the Z and tag shapes. I hand wrote the "Happy Birthday" and attached the tag to the Z with a heart shaped mini brad. The strip of blue paper was cut with a simple paper trimmer and stamped with a shoe stamp from Michaels using white ink (which was pretty slow to dry).

The sentiment at the bottom is from a homemade rub-on embellishment. It says "Birthdays are like shoes..." The sentiment is completed inside with another homemade rub on that says, "You can never have too many!"

I think if I make a card like this again, I'll use a solid color for the letter, and have the background paper as the patterned paper.