Tuesday, February 26, 2008

You're a Good Man, Charlie Brown


(click image to enlarge)

My husband is involved in a Community Theater in our area. He's currently playing Linus in You're a Good Man, Charlie Brown and this is his third production with the company. Unfortunately, I was out of town this past weekend when his show opened.

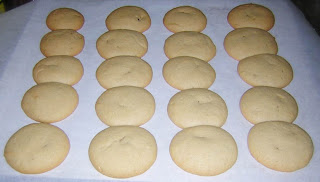
Since I couldn't be there in person, I decided to send a few "surprises" to the cast to wish them a great opening. I made cookies for the cast and director (each cast member got 4 vanilla cookies with sprinkles in a "character" color) and to go with the casts' cookies I made little post cards. The post cards had their characters on them as well as a quote from the show.

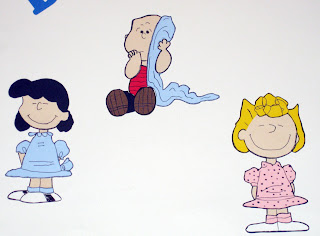
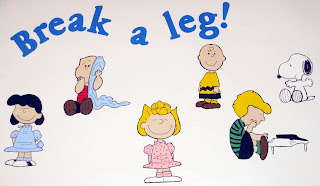
I also wanted to make a sign, because I knew that would last longer than the cookies. When my husband did his first show at the theater (Music Man), I made a hand written sign. This time, I wanted to do something a little cuter and a little more personal.

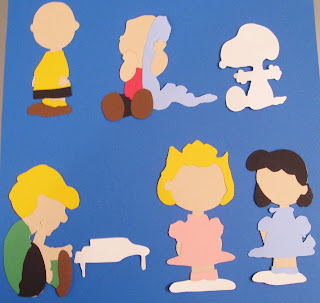
I decided to paper piece together each of the characters in the show. I used the Peanuts website as a reference. I cut out all of the characters in one solid color (peach for the people, white for Snoopy). I then cut out the clothes and other accesories. Once all of my pieces were cut out, I assembled them.
(click image to enlarge)

They definitely looked a little creepy without any outlines and markings on them. I wanted to be sure that I got the outlines and markings as close as possible to what the actual cartoons look like. I used a pencil first for some of the markings- typically the faces and on Snoopy his ears. After that, I finalized the pieces by going over the pencil with a gel pen, and I made the "outer" outline using a black marker.

They don't look identical to what Charles Schulz drew, but I don't think they should. I think they turned out quite nicely, and the cast loved the sign.

Wednesday, February 20, 2008

Going to the Chapel

(click to enlarge)

This is an engagement card that I made for a friend a few weeks ago. Her fiance surprised her with a trip to Boston and his proposal. The best part (if you ask me) is that he planned it in Boston so that two of her friends (myself and a mutual friend) could come and meet them for lunch while they were there (we- the friends- had no idea this was happening at all until we were invited for lunch).

I was inspired by $1 treat bags from Target (I forgot to snap a photo of those) for the design of this card. I wanted something cute and fun, but not too girly or frilly. I cut out the rectangles using my Circut and punched out some hearts after that.

I stamped the phrase "Going to the Chapel" on the outside of the card, and the sentiment "Best Wishes for Happily Ever After" on the inside. I went over both sentiments with gel pens to make them stand out more.

Christmas Card Sets


(click image to enlarge)

Woo, Christmas cards! I'm sure you're all feeling very inspired now that it's February and I'm posting these.

As I said before, life kind of got in the way this holiday season. So, I only made a handful of cards (the rest were, gasp, store bought this year) for close family and friends. In order to make it even easier on myself, I did varations on a theme.

I used my Cricut to cut out all of the shapes that you see on the cards. I had just gotten a new Christmas cartridge (Joys of the Season) and couldn't wait to use it. I used some gel pens (with glitter in them) and pop dots to make certain elements of the cards stand out. I also used stamps for most of the sentiments. Rudolph (top right in the top photo) has googly eyes. Half of the cards got a rounded corner punch, while the other half did not.

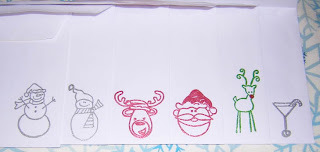
As an added bonus, I stamped the envelopes with cute holiday images. Next year, I hope to return to form and do all my cards by hand again. I just missed that experience this year.

Purse


(click image to enlarge)

While we're on the theme of sewing and homemade gifts, I made this purse for my Sister-in-Law's birthday. I have made bags for myself in the past, but never anything from a pattern and never anything really structured, per say.

This is a Simplicity Sewing for Dummies Pattern (4178), but let me tell you- the instructions are confusing as all get out. I did just fine sewing the outer fabric to the interfacing, and even sewing the lining on to those pieces. Once it got to the section where you started sewing the two halves of the bag together all hell broke loose.

It probably didn't help matters that I decided to ammend the pattern (this seems to be where most of my sewing issues start). The pattern called for a large snap closure (optional) and I thought that a zipper was more appropriate given the size of the bag (this thing is HUGE). Although I'd never sewn a zipper onto anything before I didn't think it would be that confusing or difficult.

I know what you're thinking, it's the zipper that threw me off. And actually, it really isn't. I got the zipper on just fine (even added an inside pocket with no issues- once again, not in the original pattern). The directions on how to add the strap to the purse might as well have been written in sanskrit. Even after assembling the purse (making up the strap directions myself), I still haven't a clue what they were saying.

Overall, I'm pleased with how this came out. I made myself a smaller version (the pattern has three sizes), and I think improved on it even more. Plus, I learned to sew darts using this pattern. That's a useful skill.

(Thank you to my Husband for hand modeling)

PJ Pants

(click image to enlarge)

Another year, another round of PJ pants. I made pants last year for the family (my Husband and my immediate family) as a way to incorporate some of my Husband's traditions into my family's Christmas.

I was a little hesitant to make them again this year because they are so time consuming. However, after polling the family everyone wanted another pair, so off I went to the fabric store. I took requests this year (left to right: Pa, my sister, Mom, myself, and my Husband).

I couldn't find the pattern I used last year, so I had to purchase a different one. That...turned into a miniature disaster. Last year's pattern was so insanely easy (two pieces per pair of pants) and this year's was slightly less so. This year's pattern called for a yoke around the waist line. I? was not into that.

Instead, I chose to cut the top longer (to allow extra room to fold over the waist band myself). I also left out the pockets from this pattern because who even uses pockets in their pj pants? The pocket reduction caused no problems. The yoke reduction? Yeah, major problems.

I just didn't allow enough room in the top of the pants. My pair specifically ended up being below the waist line (which is sometimes ok for jeans- sometimes- but not ever for pjs) and a major disappointment. I did get the elastic right this year (last year the waistband was too loose), so at least there's that.

Of course, after Christmas, I found the pattern from last year. I will be using that one next year.

Aprons


(click image to enlarge)
I love giving homemade gifts. I can't always do that because sometimes I just can't come up with something appropriate. This year for my Mother's birthday, I decided to make her some aprons. She has been taking cooking classes and really getting into it for a few years now. She has an apron (maybe two) at home- but just the boring white ones. I had read an article about hostess aprons and thought that they would be a great gift for Mom since she often hosts dinners at her house.

I looked through a lot of patterns before settling on the two above. There was just something about the deliciously retro feel that drew me in. Originally, I set out to make four aprons (two full, two half)- three from the pattern on the left, and one from the pattern on the right.

As her birthday approached, life kind of got int he way. Ultimately, I ended up only completing two aprons. I still have all of the fabric and the patterns, so I hope to finish the other two at a later date for her.

I made the full apron pictured in the center of the Butterick pattern. That was quite a challenge. I had never sewn a ruffle before. I think it turned out ok in the end, but I definitely learned a lot about how to sew two curved pieces together. I would highly suggest practicing that first on some "extra" fabric you have laying around. It's not as easy as you might think.

I made the half apron pictured in the bottom right corner of the Butterick pattern. That one went much smoother.

Both aprons turned out very cute, but I definitely had to make up parts of the pattern on my own. I dont' know if anyone else has this problem, but I consistently am unable to understand sections of pattern instructions. I think whoever writes those directions thinks you are a mind reader. They go from pinning piece A to piece B directly to sewing the cross section of F to the rouched edges of piece A. What? When was I supposed to rouche A?

Anyhow. Sewing is definitely a labor of love. I always love the things I make, but while I'm in the process I feel like kicking and screaming.
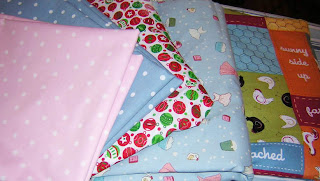
(I used the chicken fabric on the right for the full apron
and the fabric right next to that for the half apron)


C is for Cookie!

(click image to enlarge)

In case you haven't figured it out- I'm catching up on all my holiday craft postings now. Yes, that's right- in February. Heh.

I've been baking for a long time now and Christmas Cookies have always been a big tradition at my family's house. I decided this year to only make one batch because we are always traveling over the holidays and so the cookies sit around uneaten (poor lonely cookies).

I chose to make my Husband's favorites: Santa's Surprise. They are essentially peanut butter cookies with Snickers bars pieces inside. Yum. The one trick I have learned with these cookies is that you absolutely have to take them out of the oven before they brown too much. Just like chocolate chip cookies and sugar cookies, these continue to bake even after they're removed from the oven.

They may not look like much before baking, but after? Yum!


Knitting

(click image to enlarge)

Surprise, surprise loyal readers! I do more than just scrapbook and make cards. I think I have an obsessive personality when it comes to crafts. If I hear or see something that I think is interesting, I have to try it. I've been knitting for about three years now. It's not a constant (like scrapbooking and cardmaking are), but I pick it up whenever the weather gets chilly.

Originally I was going to make six (maybe seven?) scarves as gifts this year. Then we decided to do a gift exchange and that thought went out the window. I still had a friend that I wanted to give a gift to, so I decided to make a scarf.

This is the first time that I worked with the Trellis yarn. It's one that I always look at when I'm in the store, but never felt ready to attempt using. It calls for a size 15 needle, but I think I used a 10. I don't like for my scarves to be knit too loosely, and I often find that the suggested size creates a loose knit feel.

The finished product didn't photograph very well, but I loved it. I almost didn't want to part with it. In fact, I think that maybe next winter I'll pick up a skein and make a scarf for myself.