My parents came up for a visit two weeks ago. My Mom called me a few days before the visit to request a card. Her boss is expecting.
Although I know my Mom's boss, I did not know her favorite color was pink. So, I opted for a gender neutral green coupled with a lovely dark gray.
I cut out the lady and her purse with my Cricut. I used a corner punch to round the corners and stamped the phrase. Once I arranged the lady and phrase on the card, it still seemed to be missing something.
Some crystal accents were the perfect finishing touches.
Congratulations N & P! I wish you the best of luck.
Showing posts with label Paper Punch. Show all posts
Showing posts with label Paper Punch. Show all posts
Wednesday, September 16, 2009

Monday, September 14, 2009
Craft Room Organization
Ever since I moved into the new house, I've been trying to find a way to be more organized with my craft space than I ever have been before. See, the thing is, the house is bigger. My craft space is bigger. So there's an even greater potential for me to end up with more craft items than I could use in a year.
I don't know about you, but I have a horrible habit of buying things at craft stores on impulse, and then completely forgetting they're in my "stash." I am in the midst of a self imposed "paper ban" because of how much paper I have. (I do allow myself to purchase paper for specific projects- only things that require multiples of the same color/patterned paper: ie. invitations)
Clearly, I am an "out of sight, out of mind" kind of crafter.
My solution? To get organized, in a very visable way.
My craft room is far from complete, but I am really pleased with the progress I've made.
At the old apartment, I had a steel storage unit, consisting of eight drawers per side (two of those, per side), with an opening in the middle. The unit also had a top "shelf." I got it from Ikea, and it served me pretty well.
The new house, having a larger space for my crafts (which is a shared space for our office and music room), needed something more. I have a great work space (again, from Ikea) that's deep enough to be the home for my sewing machine, Cricut, and Cuttlebug- even when one is not in use.
My parents were visiting last weekend and wanted to go to Ikea (they were in search of a bed frame for their guest room). I was more than happy to accompany them. While wandering around the showroom, I came across the Bygel rail system. A-ha! Perfect.
I picked up one Bygel rail, two baskets, one package of s-hooks, one package of spice jars, and one bygel plastic cup. All for under $20. When I arrived home, eager to brag to my husband about my finds, he reminded me that we had an extra rail from the old apartment (we used to house kitchen items hanging from the rail).
On Saturday, I had my husband hang the rails above my craft desk. Then I went about the task of deciding what was important enough to warrant space on the rail.
Each spice jar holds a different type of embellishement (brads, eyelets, buttons, google eyes), the second basket holds ribbons (with seldom used christmas and animal print ribbons in another storage space), and the cup on the end holds pens, pencils, and glue. The top rail holds hole punches (shaped and regular), scissors, glitter, and beads from s-hooks.
The space is far from done, but it makes me excited about crafting. I already have plans on a few more things to pick up at Ikea, including more s-hooks. Eventually we hope to pain the room (a nice slate gray color, we're not too into the beige/yellow feel right now), and I plan to use orange as an accent color (for a trash can, clock, etc).
Who knew Ikea could revolutionize my craft space?
Friday, March 27, 2009
Birthday Cow
Waay back in November (I told you I'd try to catch you up on all I did while I took a haitus from blogging), a good friend of mine hired me to make her 24 cards (a mixture of Birthday, Thank You, and blank cards). I was beyond excited, and also a little overwhelmed.
When I make cards, I tend to either make them one at a time, or end up with a series of cards that all look similiar. I was a little nervous about being able to offer my client (I love that word, by the way!) a broad range of cards that she would be able to use. I wanted to make sure that there was a card in there for everyone on her list.
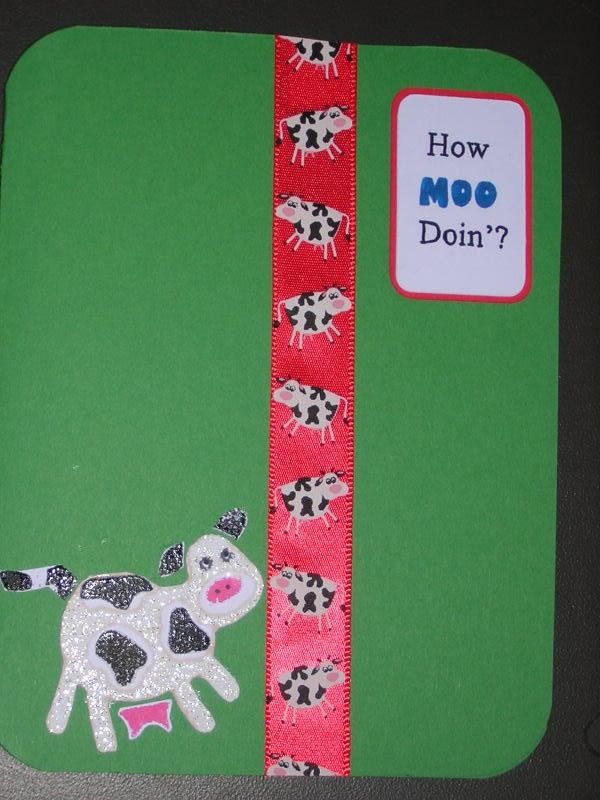
This card was one of the Birthday cards that I created. I have loved this cow stamp (part of an older Stampin' Up set) as long as I have had it, but I definitely have not used it enough in the past 8 years.
Even though the card includes flowers on the patterned paper (though, they could be sunbursts) and a ribbon, I still believe it is neutral enough to serve as a birthday card for men.
You can see some of the other 23 cards at my flickr.

When I make cards, I tend to either make them one at a time, or end up with a series of cards that all look similiar. I was a little nervous about being able to offer my client (I love that word, by the way!) a broad range of cards that she would be able to use. I wanted to make sure that there was a card in there for everyone on her list.
This card was one of the Birthday cards that I created. I have loved this cow stamp (part of an older Stampin' Up set) as long as I have had it, but I definitely have not used it enough in the past 8 years.
Even though the card includes flowers on the patterned paper (though, they could be sunbursts) and a ribbon, I still believe it is neutral enough to serve as a birthday card for men.
You can see some of the other 23 cards at my flickr.
Wednesday, October 15, 2008
Thanks So Much

Another thank you card that was made for my Aunt, Uncle, & Cousin. They sent me some very cute stationary and a nice Starbucks gift card.
I used my Cricut to cut out the smaller square, and then stamped the sentiment on it. Then the yellow background went through the Cuttlebug to give it some texture.
A simple, yet very beautiful card.
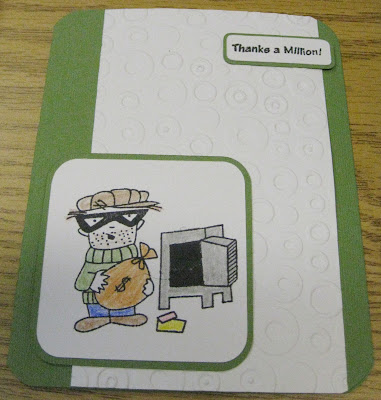
Thanks a Million!
 I've been on vacation for the past week, but I'm back now and back to posting on a regular basis.
I made this thank you card for my parents, to thank them for my birthday gifts. They sent me more crafting stuff than I would have imagined could fit into a box that size. Thank you Mom & Pa! (I know you read this blog.)
I used one of the Cuttlebug folders they gave me on this card for the background, and then used a new stamp set for the burgler and sentiment. I stamped both onto shapes that were cut out using my Cricut.
I couldn't find my gel pens, so I used crayons to color in the burgler.
I finished off the card by using my Paper punch on the corners.
Wednesday, September 03, 2008
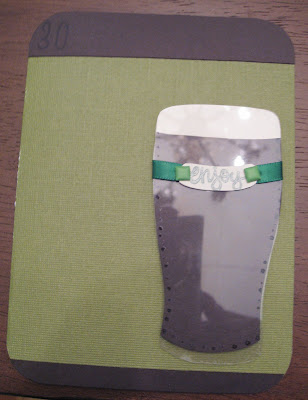
Enjoy (Birthday)
(click image to enlarge)
I made this card for a friend's 30th birthday. I wanted something that went with the theme (well, my theme) for the night- my husband & I gave the birthday boy Guinness and home brewed beer as a gift and I'd made a delicious Guinness cake for the party. Thus, the beer on the card.
The Guinness itself was paper pieced. I cut out the beer and the foam first, and then used an Overhead (clear plastic sheets) to cut out the pint glass- and yes, I cut out two pieces (one for the back and one for the front) to make it more authentic.
After I put the pint together, I stamped the sentiment and went over it with a gel pen. I cut out the piece of paper to make it look like it was curved along the glass. Then I attached a ribbon to the sentiment using brads, and put the ribbon around the pint. The pint is raised off the paper using pop dots.
Finally, I stamped "30" in the upper left corner with Versamark and rounded my edges with a paper punch.
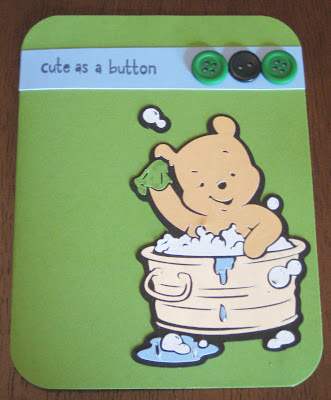
Cute as a Button
 (click image to enlarge)
 I made this card for some friends who we recently found out are expecting. I had just gotten my new Pooh Font cartridge and really wanted to use it.
This little Pooh was too cute to pass up. Since I have no idea if the baby is a boy or a girl, I stuck with neutral colors. I just love that rich green color.
I used a corner punch to round the corners and added buttons to accent the stamped phrase. Although you can't see it in the photo, I used a gel pen for Pooh's tongue.
Tuesday, April 08, 2008
Thanks (House Guest)
 (click image to enlarge)
I made this card for some friends of mine who let me stay at their home for a few days while I was at a conference out of state. I originally wanted to have a card with me, to leave at the house when I left, but this one ended up having to go in the mail.
The house and sentiment were cut with the Cricut. The house was really complicated with a lot of pieces. I made the house at 3 inches, but the pieces were still very small. I think it turned out pretty well.
Wednesday, February 20, 2008
Going to the Chapel
 (click to enlarge)
This is an engagement card that I made for a friend a few weeks ago. Her fiance surprised her with a trip to Boston and his proposal. The best part (if you ask me) is that he planned it in Boston so that two of her friends (myself and a mutual friend) could come and meet them for lunch while they were there (we- the friends- had no idea this was happening at all until we were invited for lunch).
I was inspired by $1 treat bags from Target (I forgot to snap a photo of those) for the design of this card. I wanted something cute and fun, but not too girly or frilly. I cut out the rectangles using my Circut and punched out some hearts after that.
I stamped the phrase "Going to the Chapel" on the outside of the card, and the sentiment "Best Wishes for Happily Ever After" on the inside. I went over both sentiments with gel pens to make them stand out more.
Christmas Card Sets


(click image to enlarge)
Woo, Christmas cards! I'm sure you're all feeling very inspired now that it's February and I'm posting these.
As I said before, life kind of got in the way this holiday season. So, I only made a handful of cards (the rest were, gasp, store bought this year) for close family and friends. In order to make it even easier on myself, I did varations on a theme.
I used my Cricut to cut out all of the shapes that you see on the cards. I had just gotten a new Christmas cartridge (Joys of the Season) and couldn't wait to use it. I used some gel pens (with glitter in them) and pop dots to make certain elements of the cards stand out. I also used stamps for most of the sentiments. Rudolph (top right in the top photo) has googly eyes. Half of the cards got a rounded corner punch, while the other half did not.
As an added bonus, I stamped the envelopes with cute holiday images. Next year, I hope to return to form and do all my cards by hand again. I just missed that experience this year.

Wednesday, September 19, 2007
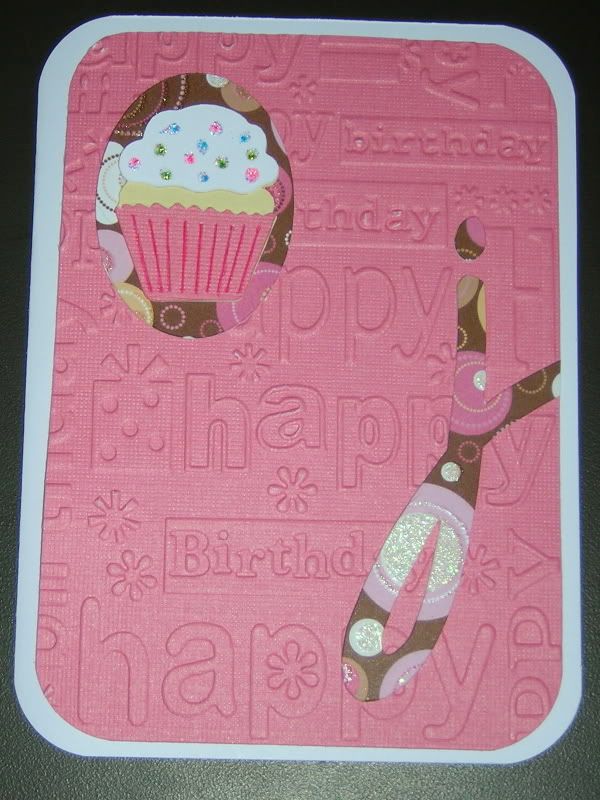
Happy Birthday
 (click image to enlarge)
I made this card for a friend from College. I wanted to do something simple- that said Birthday without being too over the top.
I embossed the pink background paper using my Cuttlebug. I cut the "j," oval, and cupcake out using my Cricut. I colored the "sprinkles" on the cupcake using a gel pen and then went over them with iridescent glitter glue. I finished off the card by using a rounded corner punch on the background paper and the card itself.
The inside is blank.
Wednesday, July 04, 2007
Just Married
It's been a long time since I last posted. Things have been very busy around my house and I (unfortunately) haven't had as much time to craft as I would like. Now that summer's in full swing things have slowed down a little and I'm hoping to get craft again.
Now...onto the card.
 (click image to enlarge)
Now...onto the card.
 (click image to enlarge)
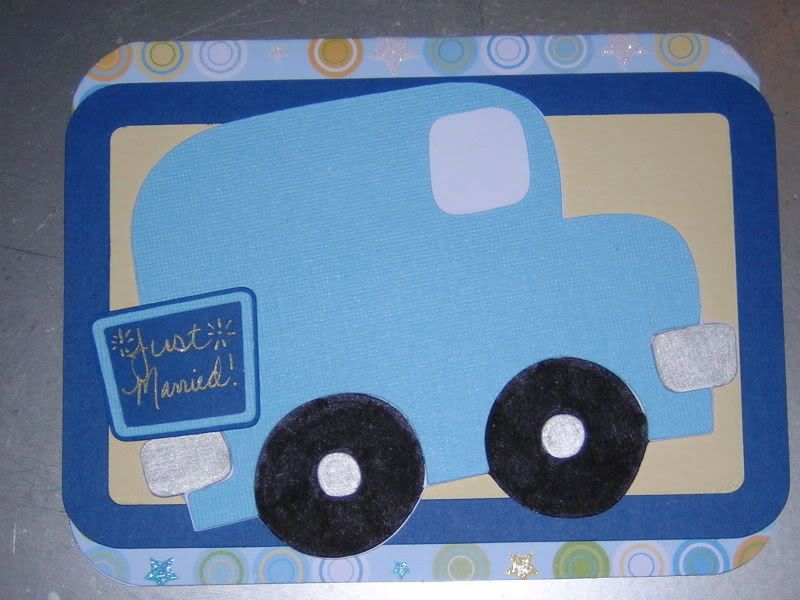
I made this card for a friend who recently got married. She and her husband are taking a long road trip for their honeymoon so the card (and gift) were themed appropriately.
I used my Cricut to cut out the bus and altered it to look more like a van by leaving some of the windows out. I also cut out the rectangle frame (dark blue) and the "Just Married" sign. I hand wrote "Just Married!" with a gold gel pen.
The sentiment inside the card reads "Best of luck as you begin your journey together!"
Tuesday, April 24, 2007
A Little Note
 (click image to enlarge)
I made this card a few weeks ago, but I didn't want to post it until I had sent it out in the mail.
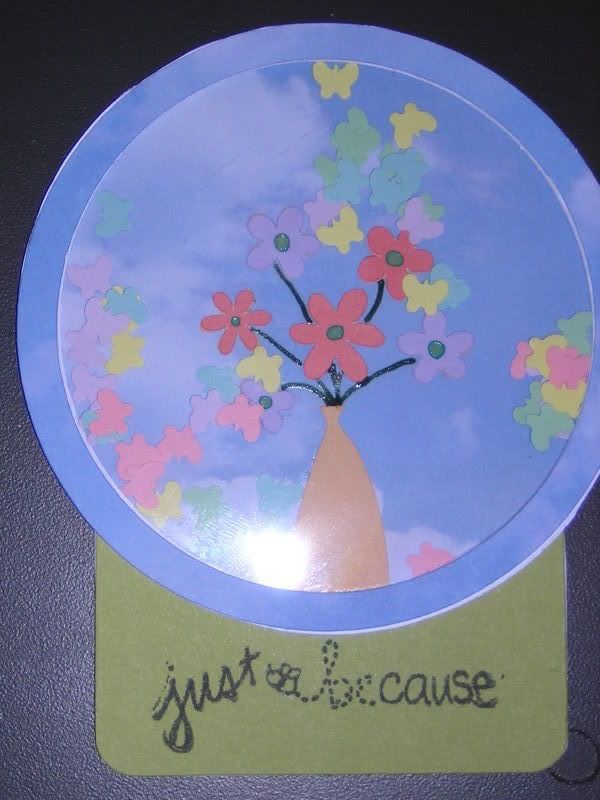
I cut out the "globe" and the green rectangle using my Cricut. I layered several silhouette cuts of the circle to give it the depth needed, and then used a circle of transperency material for the covering.
I inked the edges of the envelope, and used a gel pen to accent the "folds" and heart. I used a paper punch for all the music notes inside the globe.
I used a stamp on the green rectangle, and did not notice until after I took the photo that it was spelled incorrectly (I've already contacted the distributer and should be getting a copy of the new stamp, with the correct spelling). I fixed the misspelling with a pen.
I sent out a different variation of this card to another friend as well.
Thursday, April 19, 2007
Congrats (Engagement)
 (click image to enlarge)
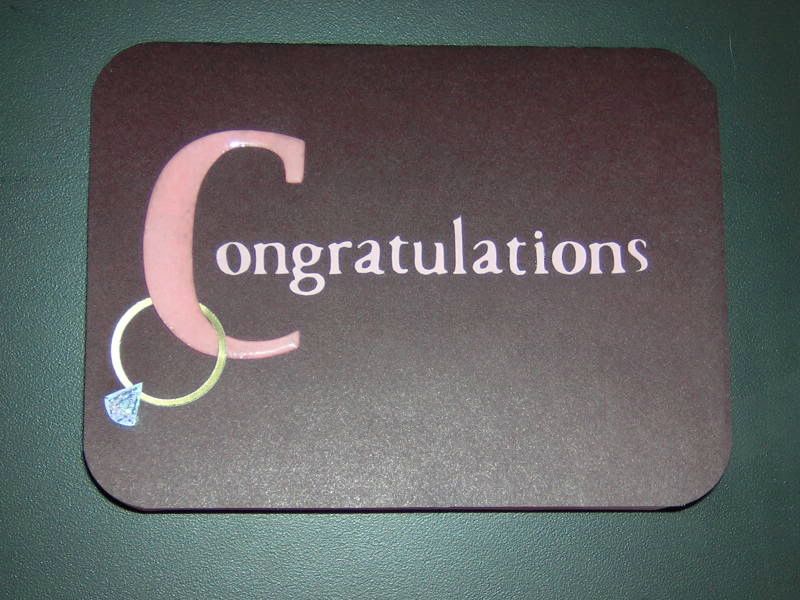
Another basic card, made for a college friend who recently got engaged.
The letters are all cut with my Cricut, as is the circle for the ring. The "C" is covered in UTEE. The diamond is hand cut, lines added with a paint pen, and then glitter glue put on top to add extra sparkle.
I finished the card with my corner rounder.
Tuesday, April 17, 2007
Just Chicken In!
 (click image to enlarge)
This card was super quick to make. I used a four sided stamp (made of a foamy material) for both the chicken and the chicken feet. I colored the chicken with different marker colors, and then used a Versamark pad for the chicken feet.
The rectangles were cut out with my Cricut. And the phrase is a homemade rub-on. I went over the rub-on with colored pens, as it was a little faded.
I used my corner rounder punch for the corners.
Congrats! (Sorority)
 (click image to enlarge)
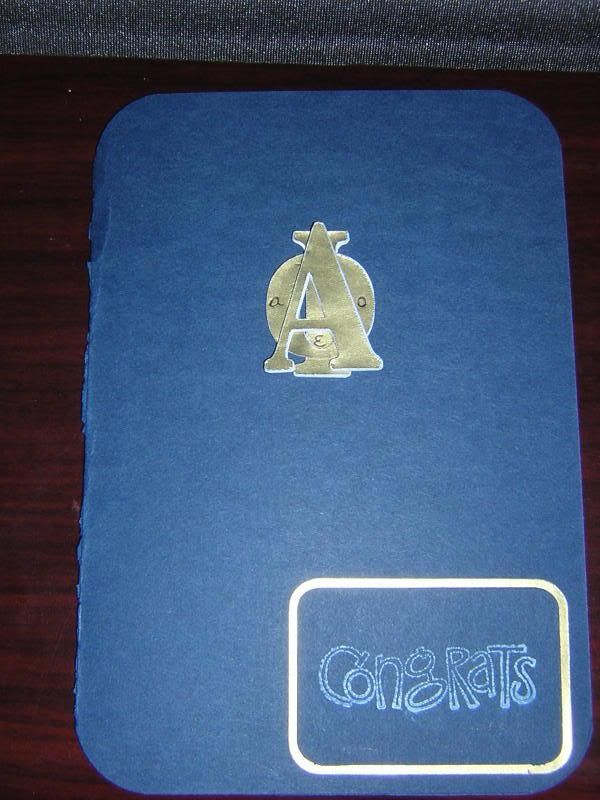
I made this card over the weekend to send to some women from my Sorority (Alpha Phi).
I used the Cricut to cut out the rectangles, and the letters. I then arranged the letters so they would resemble the Sorority's badge. Obviously, it's not identical but I think I came pretty darn close with the fonts I had available.
The "congrats" is a stamp with white ink. I love the look, but that ink takes forever to dry.
I used a darker color for the card, to make the "badge" and "congrats" stand out. Inside I adhered a white piece of cardstock to write the message on.
I used my corner rounder punch as a final touch.
Sunday, April 15, 2007
I Miss U
 (click image to enlarge)
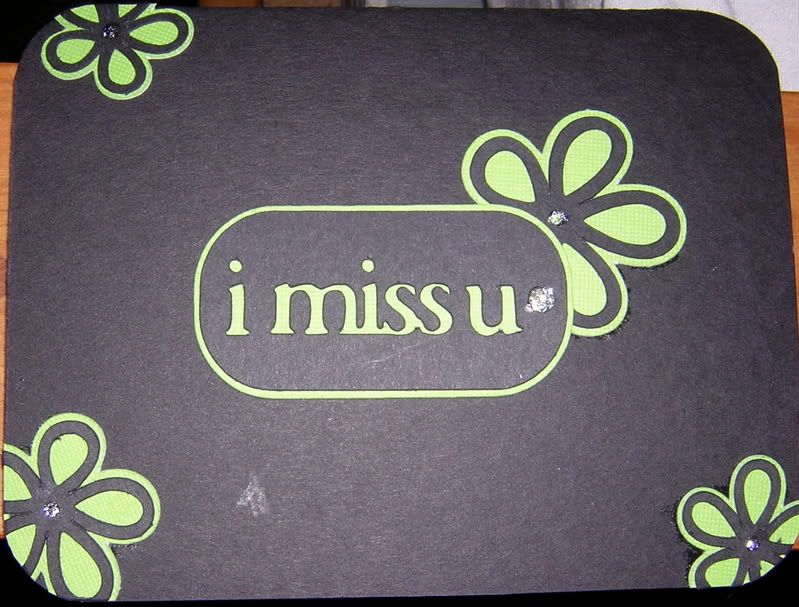
I made this card a while back for my sister who lives in another state. It was really easy.
All cuts were made using my Cricut. I cut out several different sizes for the flowers- both in shadow and silhouette, then layered them together. I used glitter glue for the centers of the flowers, and also on the "I Miss U" tag. I used my corner rounder (paper punch) for the corners.
Inside, it says "in my thoughts" which is a stamped sentiment.
Friday, April 13, 2007
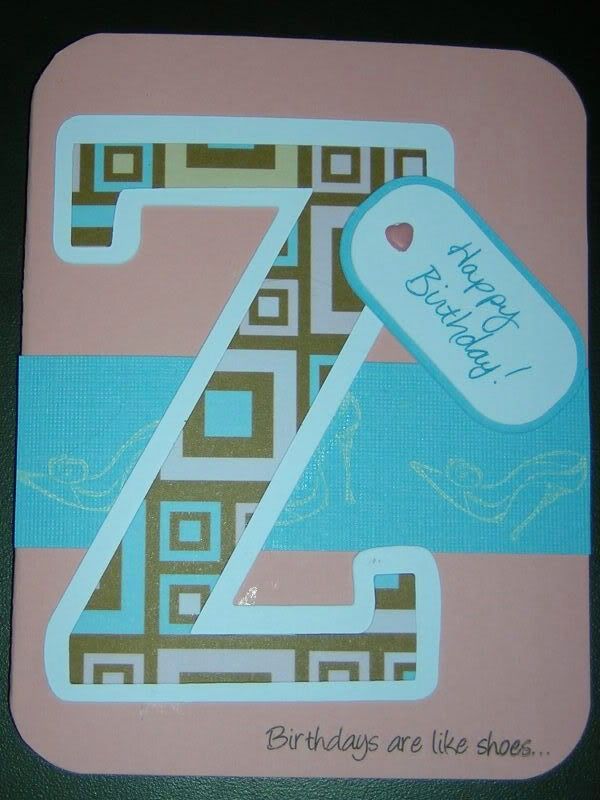
Birthdays are like shoes...
 (click image to enlarge)
This was a pretty simple card to make. I used my Cricut for the Z and tag shapes. I hand wrote the "Happy Birthday" and attached the tag to the Z with a heart shaped mini brad. The strip of blue paper was cut with a simple paper trimmer and stamped with a shoe stamp from Michaels using white ink (which was pretty slow to dry).
The sentiment at the bottom is from a homemade rub-on embellishment. It says "Birthdays are like shoes..." The sentiment is completed inside with another homemade rub on that says, "You can never have too many!"
Thursday, April 12, 2007
Feel Better...Real Soon!
 (click image to enlarge)
This is a pretty easy Get Well card that I made recently. It's not perfect, but it turned out pretty well considering I only had a vague idea of what I wanted.
I cut all the letters and items with my Cricut, which is seriously one of the best craft tools I have ever gotten. It took a little while to get the "band aid" to look right. If I make this card again, I think I would actually punch holes in the mid-section of the band aid, as opposed to just making dots with a pen.
I also don't think I would use a corner rounder (paper punch) on the bottom. It kind of made "fell better" all smushy. I don't like that at all.
The heart, however, turned out great. I used a white paint pen for the stitching effect. I'm still not brave enough to try my sewing machine on paper.
Inside the card it says "Real Soon!" The lettering is just like the front, only opposite colors- so white text with a navy outline (shadow).
Subscribe to:
Posts (Atom)

