Showing posts with label Pop Dots. Show all posts

Monday, June 29, 2009

Inspiration from NYC

Christyn, of Bead Up, does wonderful posts where she shares the inspiration behind some of her pieces. I love those posts and they make me think about where my inspiration comes from.

Truth be told, more often then not I am inspired by what materials I have on hand. Sometimes the inspiration comes from the person who'll be receiving the card or the mood that I am in. All of these things are a little difficult to showcase.

Last weekend, my husband and I took a trip into NYC to see a show and visit a museum. I've been to NYC a number of times, but it never ceases to capture my imagination. Once, on a trip, I was ruthlessly teased for whipping out my camera at every available opportunity. After my local tour guide (a friend) realized I wasn't taking the typical "tourist" pictures, he eased up.

After returning home from our trip, I was inspired by some of the things I saw there and began working on some overdue thank you cards.
While in NYC I visited FAO Schwarz. I am a Barbie collector and FAO is one of the few stores that I can actually see an upscale doll in person before making a purchase (their selection is limited, and typically a little overpriced). A silkstone doll came home with me (she just hopped in my bag, I swear I don't know how it happened), and when I took a look at the inside of the box I found inspiration to create one of my overdue thank you cards.

The card uses the same color scheme of ivory, gold, and a little black for the lettering. I used my Cricut to cut out the square shape. The phrase and gold corner details are stamped on. I went over the stamps with gel pens to enhance their look. The final touch was a little gold ribbon.
After pulling the tissue paper back to get a better look at my new doll, her swimsuit (inspired by the original Barbie's swimsuit back in 1959- 
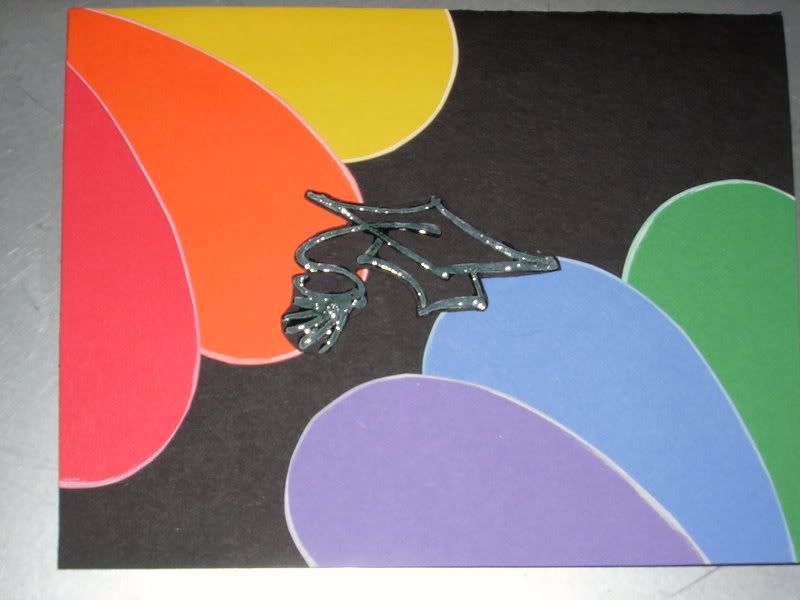
yes, this is Barbie's 50th Anniversary!) was a definite inspiration. I love the simplicity of the swimsuit, and how the black and white really draw your eye.

I used the swimsuit and the turquoise pashmina I bought as inspiration for another long overdue thank you card. I used my Cuttlebug to emboss the flower design on the black paper. Then I went over the embossed design with white and turquoise gel pens. The quadrilateral shape was cut out using my Cricut. Thank you was stamped and then enhanced using my gel pens.
Hopefully, in the future I can do more posts like this, where I can share the source of my inspiration. The trick will be remembering to snap a photo of the inspiration before it's too late.
Where do you get your inspiration?

Tuesday, September 23, 2008

Make a Wish (Birthday)

I made this card last week for a friend who had a birthday. It was inspired by a card over at the Pink Stamper.

I used my Cricut to cut out the cupcake as well as the squares. The squares are put on the card using pop dots for dimension. I used a gel pen for the sprinkles on the cupcake.

Two different colored papers are used for the background, with a ribbon pulling them together.

The sentiment in the upper left corner is stamped.

Wednesday, September 03, 2008

Enjoy (Birthday)

(click image to enlarge)

I made this card for a friend's 30th birthday. I wanted something that went with the theme (well, my theme) for the night- my husband & I gave the birthday boy Guinness and home brewed beer as a gift and I'd made a delicious Guinness cake for the party. Thus, the beer on the card.

The Guinness itself was paper pieced. I cut out the beer and the foam first, and then used an Overhead (clear plastic sheets) to cut out the pint glass- and yes, I cut out two pieces (one for the back and one for the front) to make it more authentic.

After I put the pint together, I stamped the sentiment and went over it with a gel pen. I cut out the piece of paper to make it look like it was curved along the glass. Then I attached a ribbon to the sentiment using brads, and put the ribbon around the pint. The pint is raised off the paper using pop dots.

Finally, I stamped "30" in the upper left corner with Versamark and rounded my edges with a paper punch.

Good Luck (Shamrocks)

(click image to enlarge)

I made this card for a co-worker who recently graduated and has moved on to begin her new career.

There's no Cricut on this card- now there's a phrase I rarely use. I used a Sizzix die for the Shamrocks- and then hand cut the background shamrock shape (in ivory). Although you cannot see it in the photo, I used pop dots to make the middle shamrock stand out.

Good luck was stamped and then gone over in a sparkly gel pen. I added brads to draw the eye towards the sentiment.

Tuesday, April 08, 2008

Grab the Keys

(click image to enlarge)

I made this card for my cousin who recently got her driver's license. I don't get to see her very often since we're states away and I wanted her to know that I was thinking of her.

I cut out the car & key with my Circut. I had to hand cut the windshield and front bumper on the car. I also cut the key out twice, to get the brown keyring. I hand wrote the sentiment in the bottom right hand corner.

The inside reads, "Congratulations!"

A simple card, but I think it's cute and gets the message across.

Wednesday, February 20, 2008

Christmas Card Sets


(click image to enlarge)

Woo, Christmas cards! I'm sure you're all feeling very inspired now that it's February and I'm posting these.

As I said before, life kind of got in the way this holiday season. So, I only made a handful of cards (the rest were, gasp, store bought this year) for close family and friends. In order to make it even easier on myself, I did varations on a theme.

I used my Cricut to cut out all of the shapes that you see on the cards. I had just gotten a new Christmas cartridge (Joys of the Season) and couldn't wait to use it. I used some gel pens (with glitter in them) and pop dots to make certain elements of the cards stand out. I also used stamps for most of the sentiments. Rudolph (top right in the top photo) has googly eyes. Half of the cards got a rounded corner punch, while the other half did not.

As an added bonus, I stamped the envelopes with cute holiday images. Next year, I hope to return to form and do all my cards by hand again. I just missed that experience this year.

Monday, April 23, 2007

Graduation

(click image to enlarge)

I made this card for one of my students who will be working at NBC next year. I was inspired by the peacock logo. Originally, I tried to make the peacock take up the entire front of the card. I could not get it to look right, no matter what I did. Finally, after playing around a little I went with a more abstract version. I actually like this a lot.

I cut the "peacock" feathers out freehand, then inked them with some white ink to make them stand out a bit- but also to give them the same feel that the NBC logo has.

The mortar board is a stamp that I purchased a few years back. I stamped it in white ink on black cardstock. After the ink dried, I cut the image out and went over the lines with Paper Glaze to give it more definition. The image is secured with Pop Dots for even more dimension.

The inside is blank. I thought about using a rub on (Congratulations, or Good Luck), but decided against it.