My parents came up for a visit two weeks ago. My Mom called me a few days before the visit to request a card. Her boss is expecting.
Although I know my Mom's boss, I did not know her favorite color was pink. So, I opted for a gender neutral green coupled with a lovely dark gray.
I cut out the lady and her purse with my Cricut. I used a corner punch to round the corners and stamped the phrase. Once I arranged the lady and phrase on the card, it still seemed to be missing something.
Some crystal accents were the perfect finishing touches.
Congratulations N & P! I wish you the best of luck.
Showing posts with label Cards. Show all posts
Showing posts with label Cards. Show all posts
Wednesday, September 16, 2009

Tuesday, September 01, 2009
Cupcake Congratulations
I haven't been making or blogging my papercrafts as much as I'd like as of late. So, I'm working on correcting that.
A friend of mine recently got engaged. I wanted to send her a card because it's what I do, but also because I remember how much I enjoyed the handful of engagement cards I received (hard to believe that was four years ago now).
My friend is an avid cupcake lover. I know that no matter what, I can't go wrong if her gifts/cards have cupcakes involved.
I used my Cricut to cut out the cupcake, and the shapes for the engagement ring. Instead of topping the cupcake with sprinkles or a cherry, I used the engagement ring.
The cupcake ribbon is from Michael's (I think the dollar bin a while back, it has a little sparkle to it). Then I used gel pens to decorate the engagement ring and to write the "congrats!" sentiment.
I'm really pleased with the way this card came out. It's simple and sweet, and I think it works well for the occasion.
Wednesday, July 08, 2009
And They Lived Happily Ever After
This past weekend, I spent my 4th of July at the wedding of one of my very best friends. I got to spend five full days in my hometown, reconnecting with friends and family. It was fantastic.
Of course, having to be there a few days early for the rehearsal I had to make the wedding card over a week in advance. My creative mojo usually doesn't start working until I have about an hour to finish something, so this was a bit of a challenge.
For my inspiration I pulled out the materials I'd used to create her wedding invations (I...am trying to find the one I have so that I can show you what they looked like, but I have not yet succeeded there). Her wedding colors were black, ivory, and gold.
I decided to use the gold as the main color for the card (it doesn't photograph well, but it has a slight shimmer to it). Rooting around through my stamps I came across the stamp of the couple. It's actually got three different poses for the couple and I really adore the stamp.
I used a square motif because the wedding invitations had embossed squares on them, but incorporated the circles and squiggly lines as a way to tie in the thank you notes I made for a gift (which, I stupidly forgot to photograph).
The shapes are all cut out using my Cricut and the stamp of the couple was embellished using glitter gel pens.
Monday, June 29, 2009
Inspiration from NYC
Christyn, of Bead Up, does wonderful posts where she shares the inspiration behind some of her pieces. I love those posts and they make me think about where my inspiration comes from.
 While in NYC I visited FAO Schwarz. I am a Barbie collector and FAO is one of the few stores that I can actually see an upscale doll in person before making a purchase (their selection is limited, and
 typically a little overpriced). A silkstone doll came home with me (she just hopped in my bag, I swear I don't know how it happened), and when I took a look at the inside of the box I found inspiration to create one of my overdue thank you cards.
 After pulling the tissue paper back to get a better look at my new doll, her swimsuit (inspired by the original Barbie's swimsuit back in 1959-
  yes, this is Barbie's 50th Anniversary!) was a definite inspiration. I love the simplicity of the swimsuit, and how the black and white really draw your eye.
Truth be told, more often then not I am inspired by what materials I have on hand. Sometimes the inspiration comes from the person who'll be receiving the card or the mood that I am in. All of these things are a little difficult to showcase.
Last weekend, my husband and I took a trip into NYC to see a show and visit a museum. I've been to NYC a number of times, but it never ceases to capture my imagination. Once, on a trip, I was ruthlessly teased for whipping out my camera at every available opportunity. After my local tour guide (a friend) realized I wasn't taking the typical "tourist" pictures, he eased up.
After returning home from our trip, I was inspired by some of the things I saw there and began working on some overdue thank you cards.
While in NYC I visited FAO Schwarz. I am a Barbie collector and FAO is one of the few stores that I can actually see an upscale doll in person before making a purchase (their selection is limited, and typically a little overpriced). A silkstone doll came home with me (she just hopped in my bag, I swear I don't know how it happened), and when I took a look at the inside of the box I found inspiration to create one of my overdue thank you cards.
The card uses the same color scheme of ivory, gold, and a little black for the lettering. I used my Cricut to cut out the square shape. The phrase and gold corner details are stamped on. I went over the stamps with gel pens to enhance their look. The final touch was a little gold ribbon.
After pulling the tissue paper back to get a better look at my new doll, her swimsuit (inspired by the original Barbie's swimsuit back in 1959-  yes, this is Barbie's 50th Anniversary!) was a definite inspiration. I love the simplicity of the swimsuit, and how the black and white really draw your eye.
I used the swimsuit and the turquoise pashmina I bought as inspiration for another long overdue thank you card. I used my Cuttlebug to emboss the flower design on the black paper. Then I went over the embossed design with white and turquoise gel pens.  The quadrilateral shape was cut out using my Cricut. Thank you was stamped and then enhanced using my gel pens.
The quadrilateral shape was cut out using my Cricut. Thank you was stamped and then enhanced using my gel pens. Hopefully, in the future I can do more posts like this, where I can share the source of my inspiration. The trick will be remembering to snap a photo of the inspiration before it's too late.
Where do you get your inspiration?
Friday, March 27, 2009
Birthday Cow
Waay back in November (I told you I'd try to catch you up on all I did while I took a haitus from blogging), a good friend of mine hired me to make her 24 cards (a mixture of Birthday, Thank You, and blank cards). I was beyond excited, and also a little overwhelmed.
When I make cards, I tend to either make them one at a time, or end up with a series of cards that all look similiar. I was a little nervous about being able to offer my client (I love that word, by the way!) a broad range of cards that she would be able to use. I wanted to make sure that there was a card in there for everyone on her list.
This card was one of the Birthday cards that I created. I have loved this cow stamp (part of an older Stampin' Up set) as long as I have had it, but I definitely have not used it enough in the past 8 years.
Even though the card includes flowers on the patterned paper (though, they could be sunbursts) and a ribbon, I still believe it is neutral enough to serve as a birthday card for men.
You can see some of the other 23 cards at my flickr.
Wednesday, October 15, 2008
Thanks So Much

Another thank you card that was made for my Aunt, Uncle, & Cousin. They sent me some very cute stationary and a nice Starbucks gift card.
I used my Cricut to cut out the smaller square, and then stamped the sentiment on it. Then the yellow background went through the Cuttlebug to give it some texture.
A simple, yet very beautiful card.
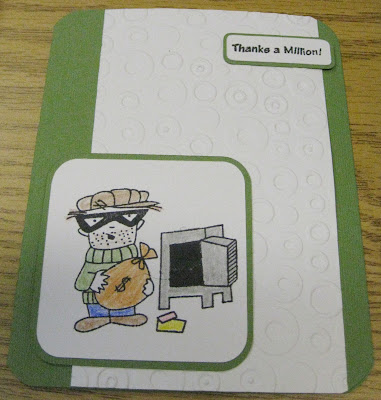
Thanks a Million!
 I've been on vacation for the past week, but I'm back now and back to posting on a regular basis.
I made this thank you card for my parents, to thank them for my birthday gifts. They sent me more crafting stuff than I would have imagined could fit into a box that size. Thank you Mom & Pa! (I know you read this blog.)
I used one of the Cuttlebug folders they gave me on this card for the background, and then used a new stamp set for the burgler and sentiment. I stamped both onto shapes that were cut out using my Cricut.
I couldn't find my gel pens, so I used crayons to color in the burgler.
I finished off the card by using my Paper punch on the corners.
Tuesday, September 23, 2008
Make a Wish (Birthday)

I made this card last week for a friend who had a birthday. It was inspired by a card over at the Pink Stamper.
I used my Cricut to cut out the cupcake as well as the squares. The squares are put on the card using pop dots for dimension. I used a gel pen for the sprinkles on the cupcake.
Two different colored papers are used for the background, with a ribbon pulling them together.
The sentiment in the upper left corner is stamped.
Wednesday, September 03, 2008
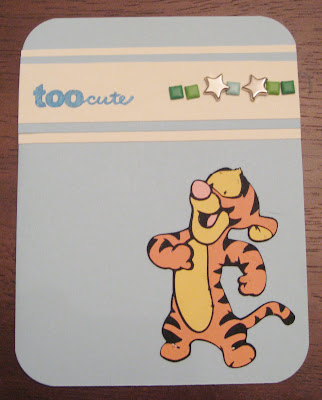
Too Cute
 (click image to enlarge)
Another Baby card for another couple who is expecting. This time I knew it was a boy, so I felt more comfortable opting for a blue palette.
Tigger is cut using my Cricut. The sentiment is stamped and then gone over with a sparkly gel pen. Finally I added brads to the top, to draw the eye to the sentiment.
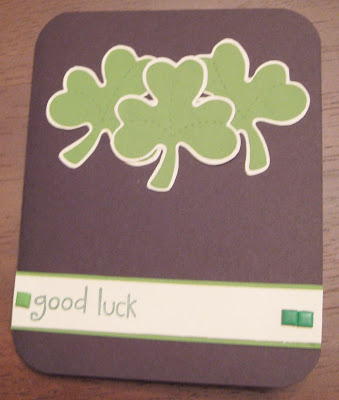
Good Luck (Shamrocks)
 (click image to enlarge)
I made this card for a co-worker who recently graduated and has moved on to begin her new career.
There's no Cricut on this card- now there's a phrase I rarely use. I used a Sizzix die for the Shamrocks- and then hand cut the background shamrock shape (in ivory). Although you cannot see it in the photo, I used pop dots to make the middle shamrock stand out.
Good luck was stamped and then gone over in a sparkly gel pen. I added brads to draw the eye towards the sentiment.
Still Together
 (click image to enlarge)
 I made this card last month for my parents' wedding anniversary.
I kept the card basic because I didn't have a lot of time to work with, and I just really wanted to do something simple.
I cut out the heart and the little couple with my Cricut. Drew on the accents with gel pens and then stamped the sentiment. The inside of the card is stamped with "After all these years!" To finish it off, I used my corner rounding punch.
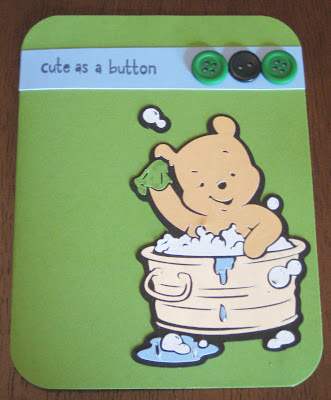
Cute as a Button
 (click image to enlarge)
 I made this card for some friends who we recently found out are expecting. I had just gotten my new Pooh Font cartridge and really wanted to use it.
This little Pooh was too cute to pass up. Since I have no idea if the baby is a boy or a girl, I stuck with neutral colors. I just love that rich green color.
I used a corner punch to round the corners and added buttons to accent the stamped phrase. Although you can't see it in the photo, I used a gel pen for Pooh's tongue.
Monday, July 28, 2008
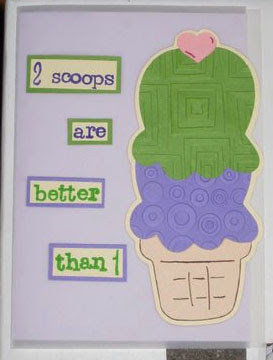
2 Scoops are better than 1
 (click image to enlarge)
I made this card for a Jack & Jill party that my husband and I attended a few weeks ago. As a gift, we got an ice cream maker and recipe book so I wanted a card that went with the theme.
I cut out the ice cream cone with my Cricut. I cut it out twice, and used only the scoop from the second cut. I ran the ice cream scoops through my Cuttlebug to texturize them, so that they would stand out from one another.
I stamped the sentiment, and used my gel pens to accent the ice cream cone, as well as the stamps.
I used vellum as the outside of the card, and placed the ice cream cone on the right edge, cutting away the vellum so that the ice cream cone served as the very edge of the card.
Tuesday, July 08, 2008
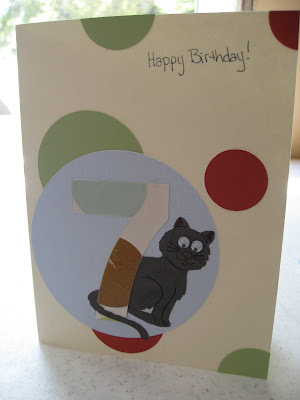
Happy Birthday (7)
 (click image to enlarge)
I made this card for my cousin who just turned 7. I wanted to highlight her age and use a theme that fit with the wrapping paper her gift was wrapped in.
All of the shapes were cut out with the Cricut. I used the wrapping paper to cut out the 7, and coordinating colors for the other dots on the card. I traced the cat's accents with gel pens and used google eyes to make the card a little more playful.
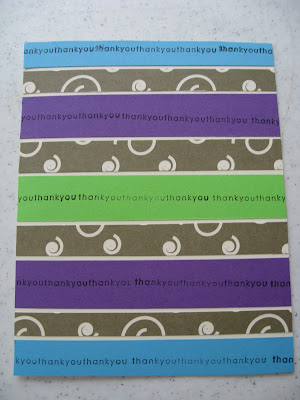
Thank you Thank you Thank you
 (click image to enlarge)
I love this card because even though it was simple to create, the design really catches the eye.
I used a paper cutter to cut strips from a patterned piece of cardstock and three colored pieces. I glued the paper to the card, and alternated the colors with the patterns. Once the paper was secured on the card, I used a clear stamp to stamp "thank you." I repeated the stamp until each color had a solid line of "thank you's" across it.
Monday, April 28, 2008
Happy Birthday (Piece of Cake)
 (click image to enlarge)
I made this card for my Husband for his birthday last week. It's super simple because I spent most of my time paper piecing an iPhone (more on that later).
I love this color scheme, even though the photo doesn't do it justice. I used a nice bright turquoise with black accents.
All of the images are stamped. I went over the stamped gifts in a sparkle gel pen, because the ink wasn't standing out enough on the black stripe. The stamp on the black stripe was repeated three times.
Welcome Little One
 (click image to enlarge)
This is a card I made for some friends who recently had their second child. I know people don't typically throw a big shower for second (or third) babies, but I thought it was a day worth celebrating.
I wanted to go with a nice girlie color scheme, but not too girlie. I'm not sure I achieved that exactly, but I loved the polka dots. I used my Cricut to cut out the bear. I used a gel pen to go over the mouth and make it stand out, and then added some fun google eyes.
The sentiment was stamped and then hand cut to resemble a flag. I went over the sentiment with a gel pen, to darken it.
I also did a simple weave in the upper left corner, in a small square, to give the card added dimension.
Minnie's Thinking of You
 (click image to enlarge)
I made this card recently to send to my Aunt. I don't get to see her as often as I'd like and I wanted to remind her that I'm always thinking of her.
I used my Cricut to cut out Minnie. I love the Disney cartridges, but they are so tough to do on a small scale. I cut Minnie as big as I could, and still leave room on the card (and have the card fit in the envelope).
I hand cut the thought bubble, and stamped the sentiment. I went over the stamp with a gel pen. I also, cut around the dots by hand. It did not turn out as I had wanted it to, but live and learn.
Tuesday, April 08, 2008
Thanks (House Guest)
 (click image to enlarge)
I made this card for some friends of mine who let me stay at their home for a few days while I was at a conference out of state. I originally wanted to have a card with me, to leave at the house when I left, but this one ended up having to go in the mail.
The house and sentiment were cut with the Cricut. The house was really complicated with a lot of pieces. I made the house at 3 inches, but the pieces were still very small. I think it turned out pretty well.
Grab the Keys
 (click image to enlarge)
I made this card for my cousin who recently got her driver's license. I don't get to see her very often since we're states away and I wanted her to know that I was thinking of her.
I cut out the car & key with my Circut. I had to hand cut the windshield and front bumper on the car. I also cut the key out twice, to get the brown keyring. I hand wrote the sentiment in the bottom right hand corner.
The inside reads, "Congratulations!"
A simple card, but I think it's cute and gets the message across.
Subscribe to:
Posts (Atom)

